# Unity Shader
### 섹션 1: Introduction
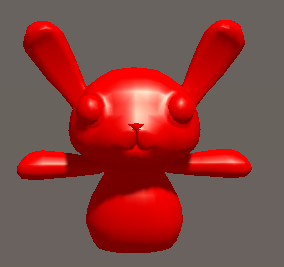
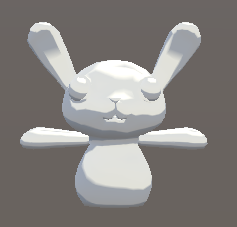
#### 8. Your First Surface Shader
```cs
Shader "Holistic/HelloShader" { // Shader set 'Holistic'에 HelloShader라는 이름의 셰이더를 만듬
Properties { // 셰이더에 input으로 넣어줄 수 있는 필드들 선언하는 곳
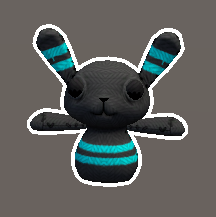
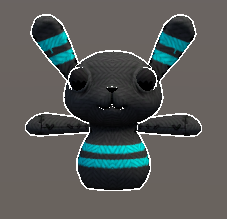
_myColor ("Albedo", Color) = (1,1,1,1)
_myColor2 ("Emission", Color) = (1,1,1,1)
}
SubShader {
CGPROGRAM // 셰이더 효과들 짜는 코드 영역 (HLSL 영역)
// 'surf'라는 이름의 surface 셰이더를 Lambert 라이트와 함께 쓰겠다는 선언
#pragma surface surf Lambert
struct Input { // 함수에 쓰일 모델의 데이터들
float2 uvMainTex;
};
fixed4 _myColor; // 프로퍼티 가져오기
fixed4 _myColor2; // 프로퍼티 가져오기
void surf (Input IN, inout SurfaceOutput o) { // input을 받아서 surfaceoutput 데이터에 반환
// Lambert를 쓰고 있으므로 output의 자료형은 SurfaceOutput
o.Albedo = _myColor.rgb;
o.Emission = _myColor2.rgb;
}
ENDCG
}
FallBack "Diffuse"
}
```
11. \~ 13.
### Variables and Packed Arrays
* 셰이더 코드를 짜는 건 픽셀 하나를 위해서 코드를 짜는 것. 따로 loop 돌릴 필요 없다.
Basic Data Types
* float : 32 bit. 정확도 가장 높음. 월드 위치, 텍스쳐 좌표, 계산에 사용됨.
* half : 16 bit. float의 절반 크기. 짧은 벡터, 방향, hdr 컬러에 사용됨.
* fixed : 11bit. 가장 낮은 정확도. 보통의 컬러 연산에 사용됨.
* int : 카운터나 배열 인덱스로 사용됨.
Texture Data Types
* sampler2D : 일반 텍스쳐
* samplerCUBD : 큐브맵 텍스쳐
* 각각의 뒤에 \_half 붙이면 low precision, \_float 붙이면 high precision
Packed Array
* 자료형 뒤에 배열의 길이를 붙이면 된다. 예시) `fixed4 colour1 = (0,1,1,0);`
* r,g,b,a 또는 x,y,z,w로 각 요소 접근. 예시) `colour1.r = 1;`
* `colour1.xgb` 이런 식으로 섞어서 쓸 순 없다. `colour1.xzy`는 가능함.
* 서로 다른 크기여도 할당하거나 연산할 수 있다. 예시) `fixed3 colour3; colour3 = colour1.rgb;`
* `fixed3 c = 1;`과 `fixed3 c = (1,1,1);`은 같은 연산이다.
* 연산할 채널과 순서를 마음대로 바꿀 수 있다. 예시) `colour1.rg = colour2.gr;`
Packed Matrices
* 선언 방법 : `float4x4 matrix;`
* 개별 접근 : `float myValue = matrix._m00;`
* chaining 예시 1 : `fixed4 colour = matrix._m00_m01_m02_m04;`
* chaining 예시 2 : `fixed4 colour = matrix[0];`
```cpp
Shader "Holistic/PackedPractice" {
Properties {
_myColour ("Example Colour", Color) = (1,1,1,1) // 흰색
}
SubShader {
CGPROGRAM
#pragma surface surf Lambert
struct Input {
float2 uvMainText;
};
fixed4 _myColour;
void surf (Input IN, inout SurfaceOutput o) {
o.Albedo.r = _myColour.r;
}
ENDCG
}
FallBack "Diffuse"
}
```
### The Anatomy of a Mesh and Shader Input
* Mesh : Vertex Array + Normal Array, UV Array, Triangle Array
* Unity에선 기본적으로 UV 좌표를 두 개까지 사용할 수 있다. (custom shader 짜면 당연히 한계 넘을 수 있긴 할듯)
* struct Input으로 mesh를 조작할 수 있다.
* surface shader function은 Input 파라미터를 사용 안 해도 써놔야 함.
* `float2 uv_MainTex;` : UV에 텍스쳐 할당 (앞은 uv나 uv2, 뒤는 텍스쳐 이름)
* `float3 viewDir;` : 카메라가 어디에 있는지
* `float3 worldPos;` : 월드 좌표계에서의 위치
* `float3 worldRefl;` : 어떻게 반사할건지
```cpp
Shader "Holistic/PackedPractice" {
Properties {
_myColour ("Example Colour", Color) = (1,1,1,1) // 흰색
}
SubShader {
CGPROGRAM
#pragma surface surf Lambert
struct Input {
float2 uvMainText;
};
fixed4 _myColour;
void surf (Input IN, inout SurfaceOutput o) {
o.Albedo.r = _myColour.r;
}
ENDCG
}
FallBack "Diffuse"
}
```
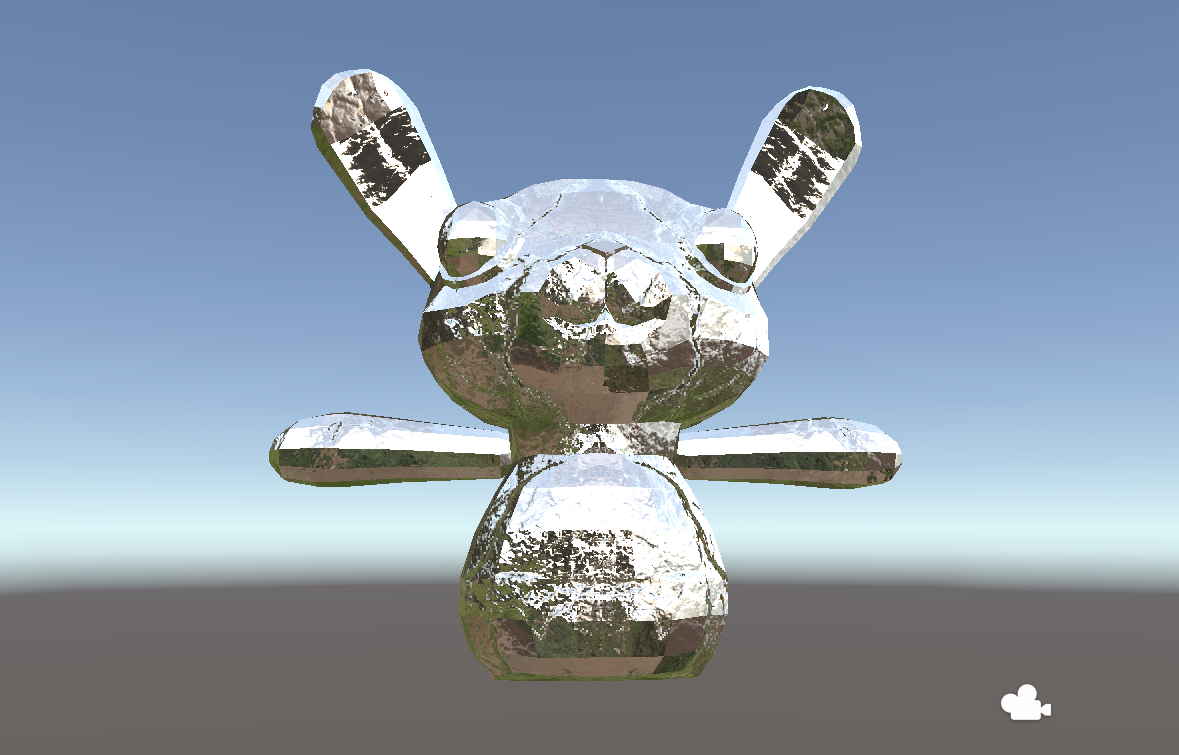
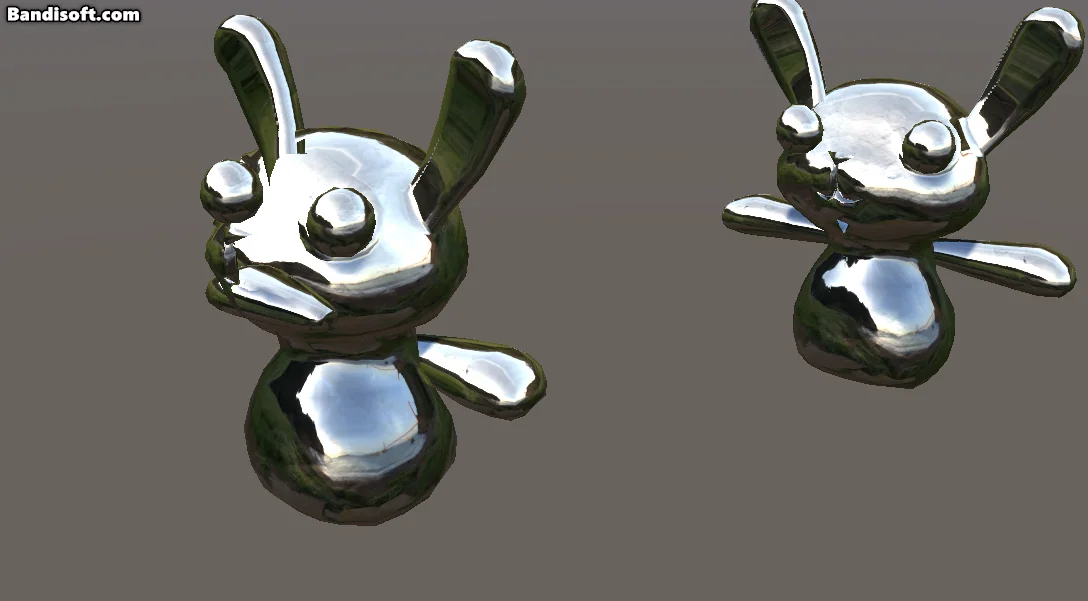
### Shader Properties
```cpp
Shader "Holistic/AllProps"
{
Properties {
_myColor ("Example Color", Color) = (1,1,1,1)
_myRange ("Example Range", Range(0,5)) = 1
_myTex ("Example Texture", 2D) = "white" {}
_myCube ("Example Cube", CUBE) = "" {}
_myFloat ("Example Float", Float) = 0.5
_myVector ("Example Vector", Vector) = (0.5,1,1,1)
}
SubShader {
CGPROGRAM
#pragma surface surf Lambert
fixed4 _myColor;
half _myRange;
sampler2D _myTex;
samplerCUBE _myCube;
float _myFloat;
float4 _myVector;
struct Input {
float2 uv_myTex;
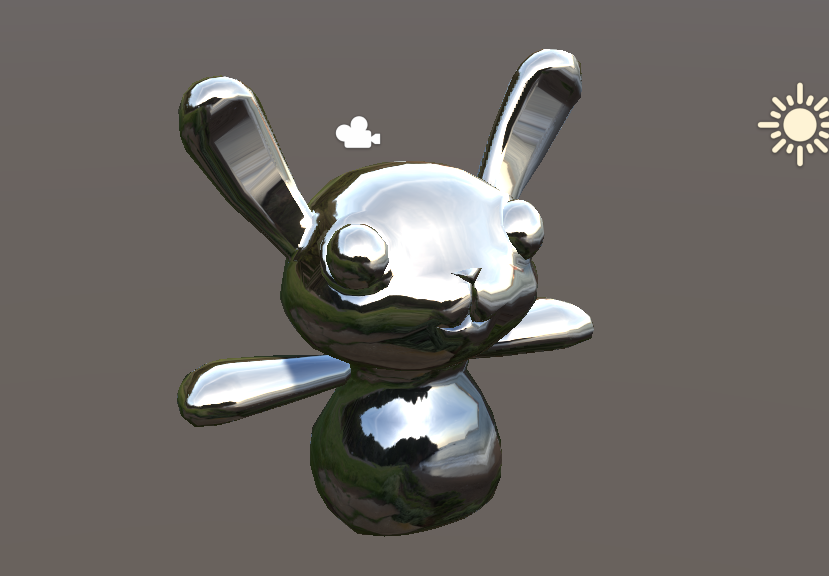
float3 worldRefl;
};
void surf (Input IN, inout SurfaceOutput o) {
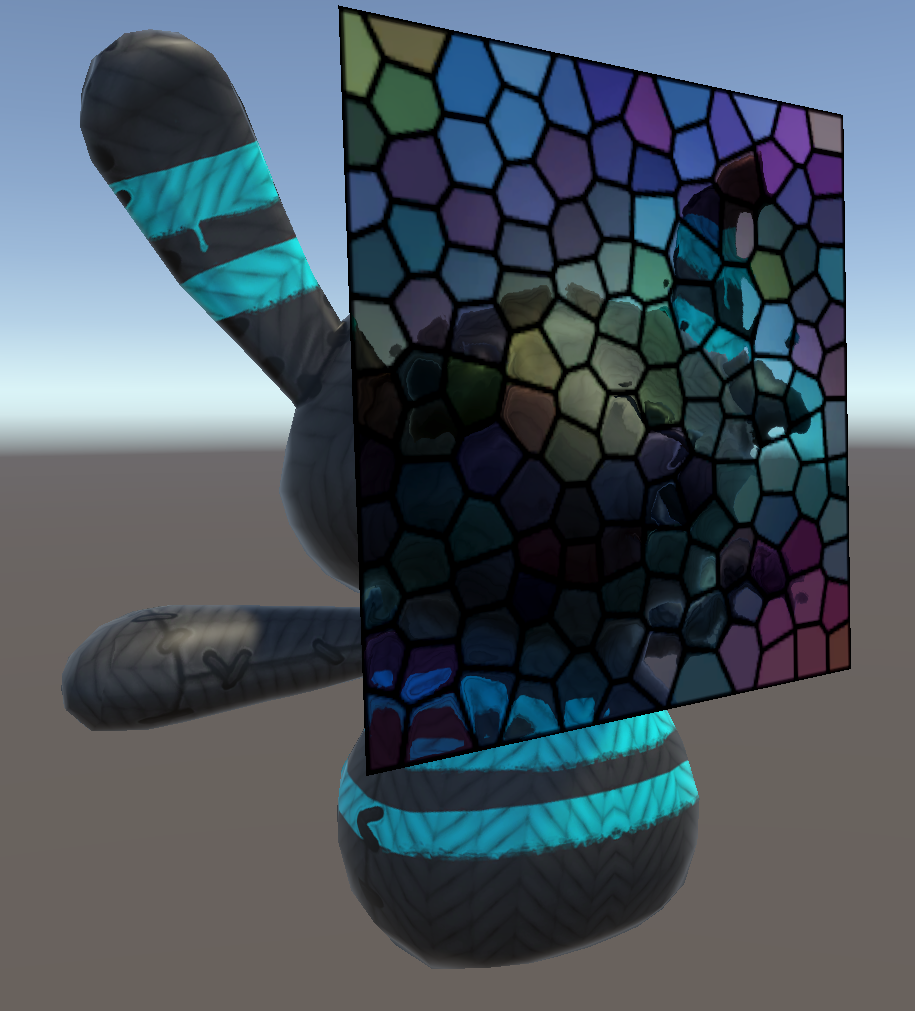
o.Albedo = (tex2D(_myTex, IN.uv_myTex) * _myRange).rgb; // _myTex를 _myRange만큼 곱한 값으로 Albedo를 설정
o.Emission = texCUBE(_myCube, IN.worldRefl).rgb; // 설정한 CUBE map을 반사
}
ENDCG
}
Fallback "Diffuse"
}
```
```cpp
Shader "Holistic/BumpDiffuse"
{
Properties {
_myDiffuse ("Diffuse Textuire", 2D) = "white" {}
_myBump ("Bump Texture", 2D) = "bump" {}
_mySlider ("Bump Amount", Range(0,10)) = 1
_mySlider2 ("Bump Texture Scale", Range(0,10)) = 1
}
SubShader {
CGPROGRAM
#pragma surface surf Lambert
sampler2D _myDiffuse;
sampler2D _myBump;
half _mySlider;
half _mySlider2;
struct Input {
float2 uv_myDiffuse;
float2 uv_myBump;
};
void surf (Input IN, inout SurfaceOutput o) {
o.Albedo = tex2D(_myDiffuse, IN.uv_myDiffuse).rgb;
o.Normal = UnpackNormal(tex2D(_myBump, IN.uv_myBump * _mySlider2));
o.Normal *= float3(_mySlider, _mySlider, 1);
}
ENDCG
}
Fallback "Diffuse"
}
```
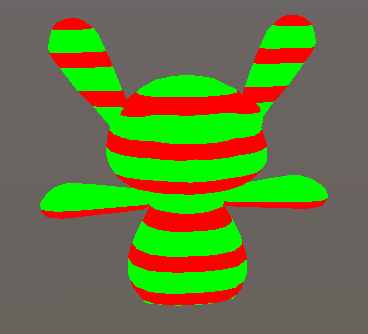
* Lambert : 광원을 향한 벡터와 법선 벡터의 각도 차이로 빛 계산. 각도 작으면 빛 많이 받고, 크면 빛 적게 받음.
* 노말맵의 rgb값은 x,y,z에 대응된다. x,y는 평면의 x,y, z는 노말 벡터를 표현.
Illumination Models
* Flat : 폴리곤 별로 normal을 하나로 합쳐 계산
* Gouraud : 폴리곤별로 vertex별 normal을 interpolate하여 계산
* Phong : 픽셀별로 vertex별 normal을 interpolate하여 계산
* 유니티는 기본으로 Phong 사용하지만, Model Import Settings에서 Normal을 Calculate로 바꾸고 Smooth Angle을 0으로 줄이면 Flat해짐 (라고는 하는데 직접 해보니까 안 flat 해짐)
### gpt 추가 질문
#### 개념
전체 흐름
```null
Shader
└── Properties ← 사용자 입력값 정의 (텍스처, 색 등)
└── SubShader ← 실제 쉐이더 코드 블록
└── CGPROGRAM ← HLSL/Cg 코드 작성 공간
└── #pragma surface ← 이 쉐이더의 성격 설정
└── Input / surf() ← 텍스처 샘플링, 표면 정보 결정
└── ENDCG
└── Fallback ← 이 쉐이더가 안 될 때 대체할 것
```
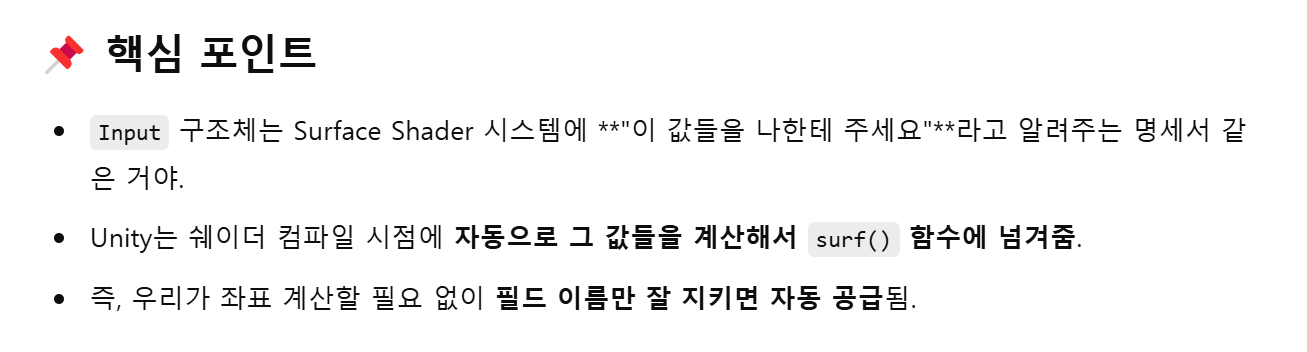
Surface Shader
* Unity Built-in render pipeline 전용 추상화 시스템
* Unity가 자동으로 라이트 계산, 그림자, 라이트맵 등을 다 처리해준다
* 개발자는 `surf()` 함수만 작성하면 나머지는 Unity가 채워준다.
Surface Shader에서 채워야 하는 것들
* `void surf(Input IN, inout SurfaceOutput o)`
* `IN` : Unity가 자동으로 채워주는 입력값들 (UV, worldPos 등)
* `o` : 직접 설정한 표면 결과 (Albedo, Normal 등)
#### 문법
SubShader
* 쉐이더의 구현이 들어가는 블록
* 하나의 쉐이더 안에 여러 SubShader 넣을 수 있다
* 그래픽 카드 성능이나 플랫폼에 따라 SubShader 자동 선택
* 일종의 "플랜 A / 플랜 B / 플랜 C" 같은 역할
CGPROGRAM \~ ENDCG
* 이 사이만 실제 쉐이더 코드로 인식된다
* `CGPROGRAM`은 "Cg 언어 프로그램"의 줄임말, 옛날에 쓰던거고, 지금은 HLSL로 컴파일됨.
`#pragma`
* 컴파일러에게 쉐이더 정보 알려주는 지시어
* `surface surf` : surf 함수가 이 쉐이더의 surface 함수다
* `Lambert` : 조명 모델은 Lambert다
surface
* 표면의 재질 정보를 정의하는 함수
* Unity가 각 픽셀마다 해당 함수 호출해서 Albedo, Smootheness, Normal 등 결정
* SurfaceOutput 구조체는 Unity가 조명 계산에 쓰는 표면 정보들 담고 있음
Fallback
* 해당 쉐이더가 지원되지 않을 때, 대신 쓸 기본 쉐이더
#### 자료형
* `in` : 읽기 전용. 값 받아서 읽기만 가능.
* `out` : 쓰기 전용. 함수 내부에서 초기화해서 밖으로 전달.
* `inout` : 읽기 + 쓰기. 받아온 값 수정해서 돌려보냄.
23. \~ 25.
```cpp
o.Albedo = texCUBE(_myCube, IN.worldRefl).rgb;
```
worldRefl : 내가 보는 방향과 표면의 노멀을 기준으로 계산된 반사 방향
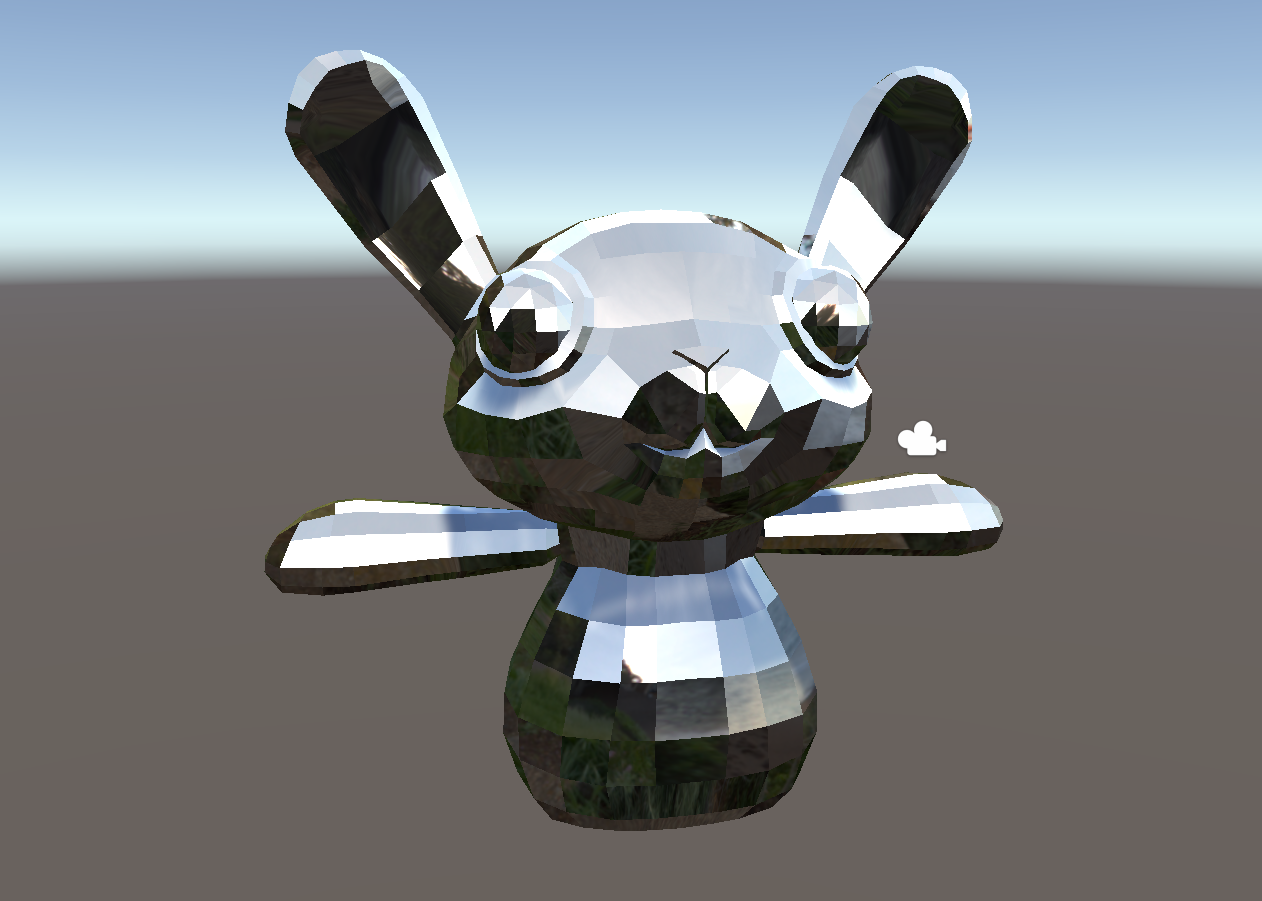
model import settings에서 Normals를 Calculate로 바꾸고 Smoothing Angle을 조절하면 폴리곤 단위로 노말 계산
```cpp
struct Input {
float2 uv_myDiffuse;
float2 uv_myBump;
float3 worldRefl; INTERNAL_DATA
};
void surf (Input IN, inout SurfaceOutput o) {
o.Albedo = tex2D(_myDiffuse, IN.uv_myDiffuse).rgb;
o.Normal = UnpackNormal(tex2D(_myBump, IN.uv_myBump)) * _myBright;
o.Normal *= float3(_mySlider, _mySlider, 1);
o.Emission = texCUBE(_myCube, WorldReflectionVector (IN, o.Normal)).rgb;
}
```
* worldRefl 이용하려고 할 때 Normal을 수정하면 오류가 생긴다. normal과 worldRefl은 연관돼있기 때문. worldRefl에 INTERNAL\_DATA 붙이면 영향 안 받는 별개의 worldRefl 사용 가능.
Buffer
* frame buffer : 스크린에 있는 모든 픽셀의 색깔 정보 담음
* depth buffer (z buffer) : 픽셀의 깊이 정보 담음
* frame buffer에 그려지기 전에 depth buffer에서 앞에 그려진거 있나 확인
* G-Buffer (Geometry Buffer) : Deffered rendering에 쓰인다.
Rendering Types
* Forward Rendering : Geometry > Vertex Shader > Geometry Shader > Fragment Shader Lighting (픽셀별로 계산됨) > Frame Buffer
* Deferred Rendering : Forward Rendering이랑 거의 똑같은데 Fragment Shader 까지 한 결과물을 한꺼번에 G-Buffer에 넣고 Lighting 얹어서 Frame Buffer에 보냄
Render Queues
* Background : 1000
* Geometry : 2000
* AlphaTest : 2450
* Transparent : 3000
* Overlay : 4000
* Material Inspector에서 설정하거나,\
Shader에서 \`Tags { "Queue" = "Geometry+100" } 으로 설정 가능
26. \~ 29.
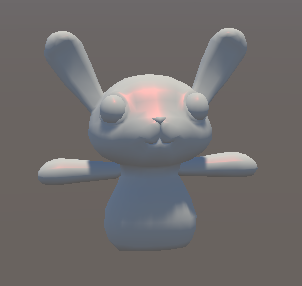
basic rim lighting
```cpp
void surf (Input IN, inout SurfaceOutput o) {
half rim = 1 - saturate(dot(normalize(IN.viewDir), o.Normal));
o.Emission = _RimColor.rgb * pow(rim,_RimPower);
}
```
double if
```cpp
void surf (Input IN, inout SurfaceOutput o) {
half rim = 1 - saturate(dot(normalize(IN.viewDir), o.Normal));
o.Emission = rim > 0.5 ? float3(1,0,0) : rim > 0.3 ? float3(0,1,0): 0;
}
```
frac() : only decimal part
```cpp
void surf (Input IN, inout SurfaceOutput o) {
half rim = 1 - saturate(dot(normalize(IN.viewDir), o.Normal));
o.Emission = frac(IN.worldPos.y * 10 * 0.5) > 0.4 ? float3(0,1,0) : float3(1,0,0);
}
```
30. \~ 37.
* 램버트 모델 : 노멀 벡터와 광원 방향 벡터 내적
* 퐁 모델 : 표면에 반사된 빛 벡터와 시선 벡터의 각도 차이
* 블린퐁 모델 : 반사된 빛 벡터와 시선 벡터를 더하고 정규화한 하프 벡터와 노멀 벡터를 내적
```cpp
Shader "Holistic/BasicBlinn" {
Properties{
_Colour("Colour", Color) = (1,1,1,1)
_SpecColor("Colour", Color) = (1,1,1,1)
_Spec("Specular", Range(0,1)) = 0.5
_Gloss("Gloss", Range(0,1)) = 0.5
}
SubShader {
Tags {
"Queue" = "Geometry"
}
CGPROGRAM
#pragma surface surf BlinnPhong
float4 _Colour;
half _Spec;
fixed _Gloss;
struct Input {
float2 uv_MainTex;
};
void surf(Input IN, inout SurfaceOutput o) {
o.Albedo = _Colour.rgb;
o.Specular = _Spec;
o.Gloss = _Gloss;
}
ENDCG
}
Fallback "Diffuse"
}
```
* SpecColor는 정의하지 않는 이유 : 유니티의 'include' 파일에 이미 정의돼있음
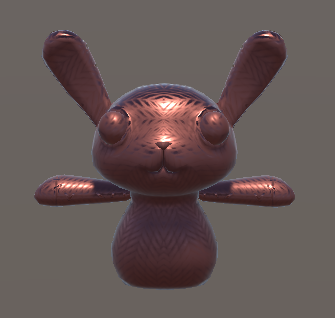
```cpp
Shader "Holistic/StandardPBR" {
Properties {
_Color("Color", Color) = (1,1,1,1)
_MetalicTex ("Metalic (R)", 2D) = "white" {}
_Metalic("Metalic", Range(0.0, 1.0)) = 0.0
}
SubShader {
Tags { "Queue" = "Geometry" }
CGPROGRAM
#pragma surface surf Standard
sampler2D _MetalicTex;
half _Metalic;
fixed4 _Color;
struct Input {
float2 uv_MetalicTex;
};
void surf(Input IN, inout SurfaceOutputStandard o) {
o.Albedo = _Color.rgb;
o.Smoothness = tex2D (_MetalicTex, IN.uv_MetalicTex).r;
o.Metallic = _Metalic;
}
ENDCG
}
Fallback "Diffuse"
}
```
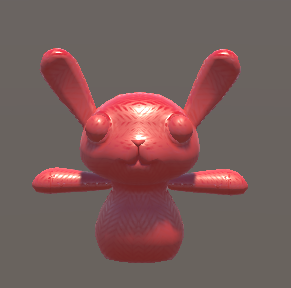
```cpp
Shader "Holistic/StandardSpecPBR" {
Properties {
_Color("Color", Color) = (1,1,1,1)
_MetalicTex ("Metalic (R)", 2D) = "white" {}
_SpecColor("Specular", Color) = (1,1,1,1)
}
SubShader {
Tags { "Queue" = "Geometry" }
CGPROGRAM
#pragma surface surf StandardSpecular
sampler2D _MetalicTex;
fixed4 _Color;
struct Input {
float2 uv_MetalicTex;
};
void surf(Input IN, inout SurfaceOutputStandardSpecular o) {
o.Albedo = _Color.rgb;
o.Smoothness = tex2D (_MetalicTex, IN.uv_MetalicTex).r;
o.Specular = _SpecColor;
}
ENDCG
}
Fallback "Diffuse"
}
```

```cpp
#pragma surface surf BasicLambert
half4 LightingBasicLambert (SurfaceOutput s, half3 lightDir, half atten) {
half NdotL = dot (s.Normal, lightDir);
half4 c;
c.rgb = s.Albedo * _LightColor0.rgb * (NdotL * atten);
c.a = s.Alpha;
return c;
}
```
custom lighting model
* atten : 표면에서의 빛의 감쇄율
* \_LightColor0 : 오브젝트를 비추는 '모든' 빛의 합
```cpp
#pragma surface surf BasicBlinn
half4 LightingBasicBlinn (SurfaceOutput s, half3 lightDir, half3 viewDir, half atten) {
half3 h = normalize (lightDir + viewDir);
half diff = max (0, dot (s.Normal, lightDir));
float nh = max (0, dot(s.Normal, h));
float spec = pow (nh, 48.0);
half4 c;
c.rgb = (s.Albedo * _LightColor0.rgb * diff + _LightColor0.rgb * spec) * atten;
c.a = s.Alpha;
return c;
}
```
```cpp
#pragma surface surf ToonRamp
float3 _Color;
sampler2D _RampTex;
float4 LightingToonRamp (SurfaceOutput s, fixed3 lightDir, fixed atten)
{
float diff = dot (s.Normal, lightDir);
float h = diff * 0.5 + 0.5;
float2 rh = h;
float3 ramp = tex2D(_RampTex, rh).rgb;
float4 c;
c.rgb = s.Albedo * _LightColor0.rgb * (ramp);
c.a = s.Alpha;
return c;
}
```
```cpp
void surf (Input IN, inout SurfaceOutput o)
{
fixed4 c = tex2D (_MainTex, IN.uv_MainTex);
o.Albedo = c.rgb;
o.Alpha = c.a;
}
```
Alpha 채널 사용
* RenderQueue를 AlphaTest로 하면 Opaque 앞에서만 보이고
* Transparent로 하면 제대로 보임
* alpha:fade 붙여야 알파 채널 사용 가능
```cpp
Pass {
ZWrite On
ColorMask 0
}
CGPROGRAM
#pragma surface surf Lambert alpha:fade
struct Input {
float3 viewDir;
};
float4 _RimColor;
float _RimPower;
void surf (Input IN, inout SurfaceOutput o) {
// Rim lighting
half rim = 1.0 - saturate(dot (normalize(IN.viewDir), o.Normal));
o.Emission = _RimColor.rgb * pow(rim, _RimPower) * 10;
// Interior transparency
o.Alpha = pow(rim, _RimPower);
}
ENDCG
```
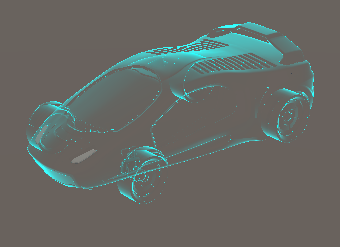
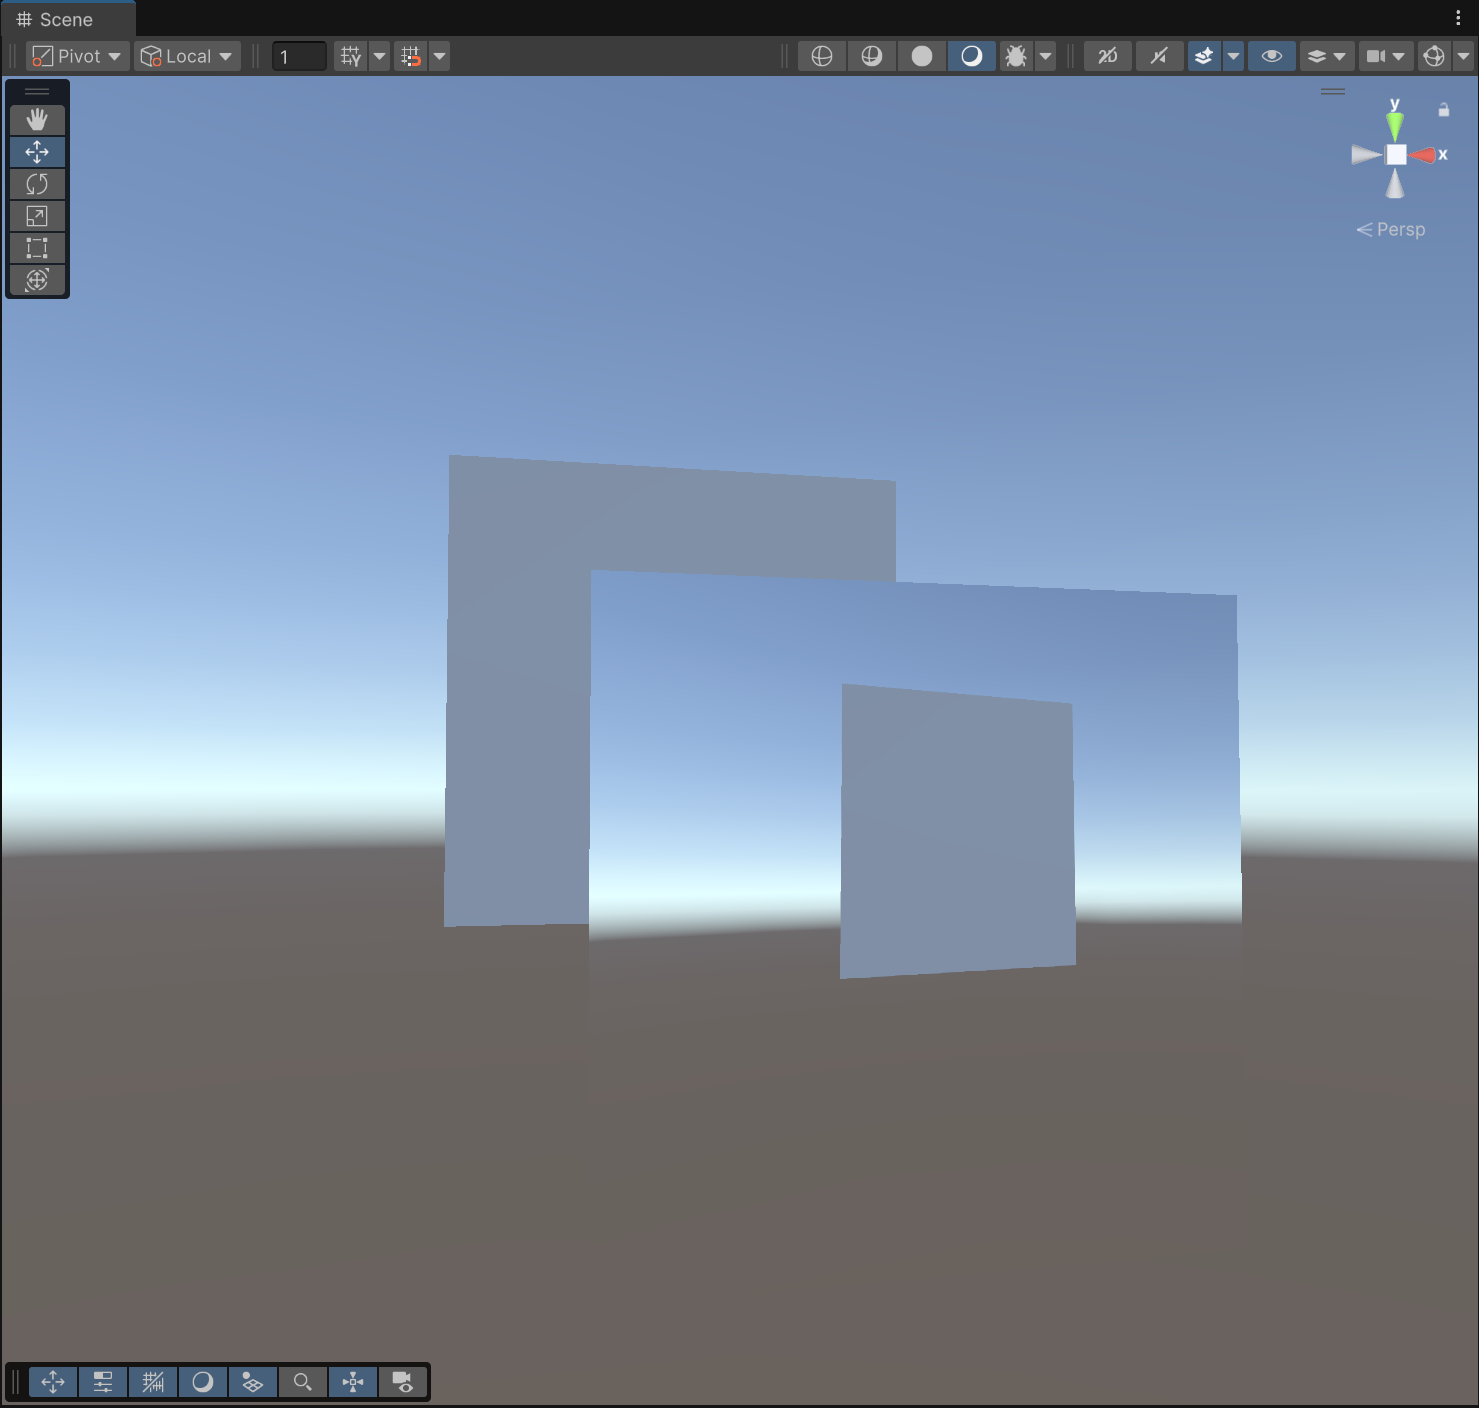
Hologram
* 바깥쪽은 rim lighting, 안쪽은 transparent로 만드는 코드
* 안쪽이 완전히 비춰보이지 않게 하려면 depth pass 이용
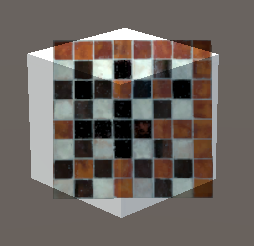
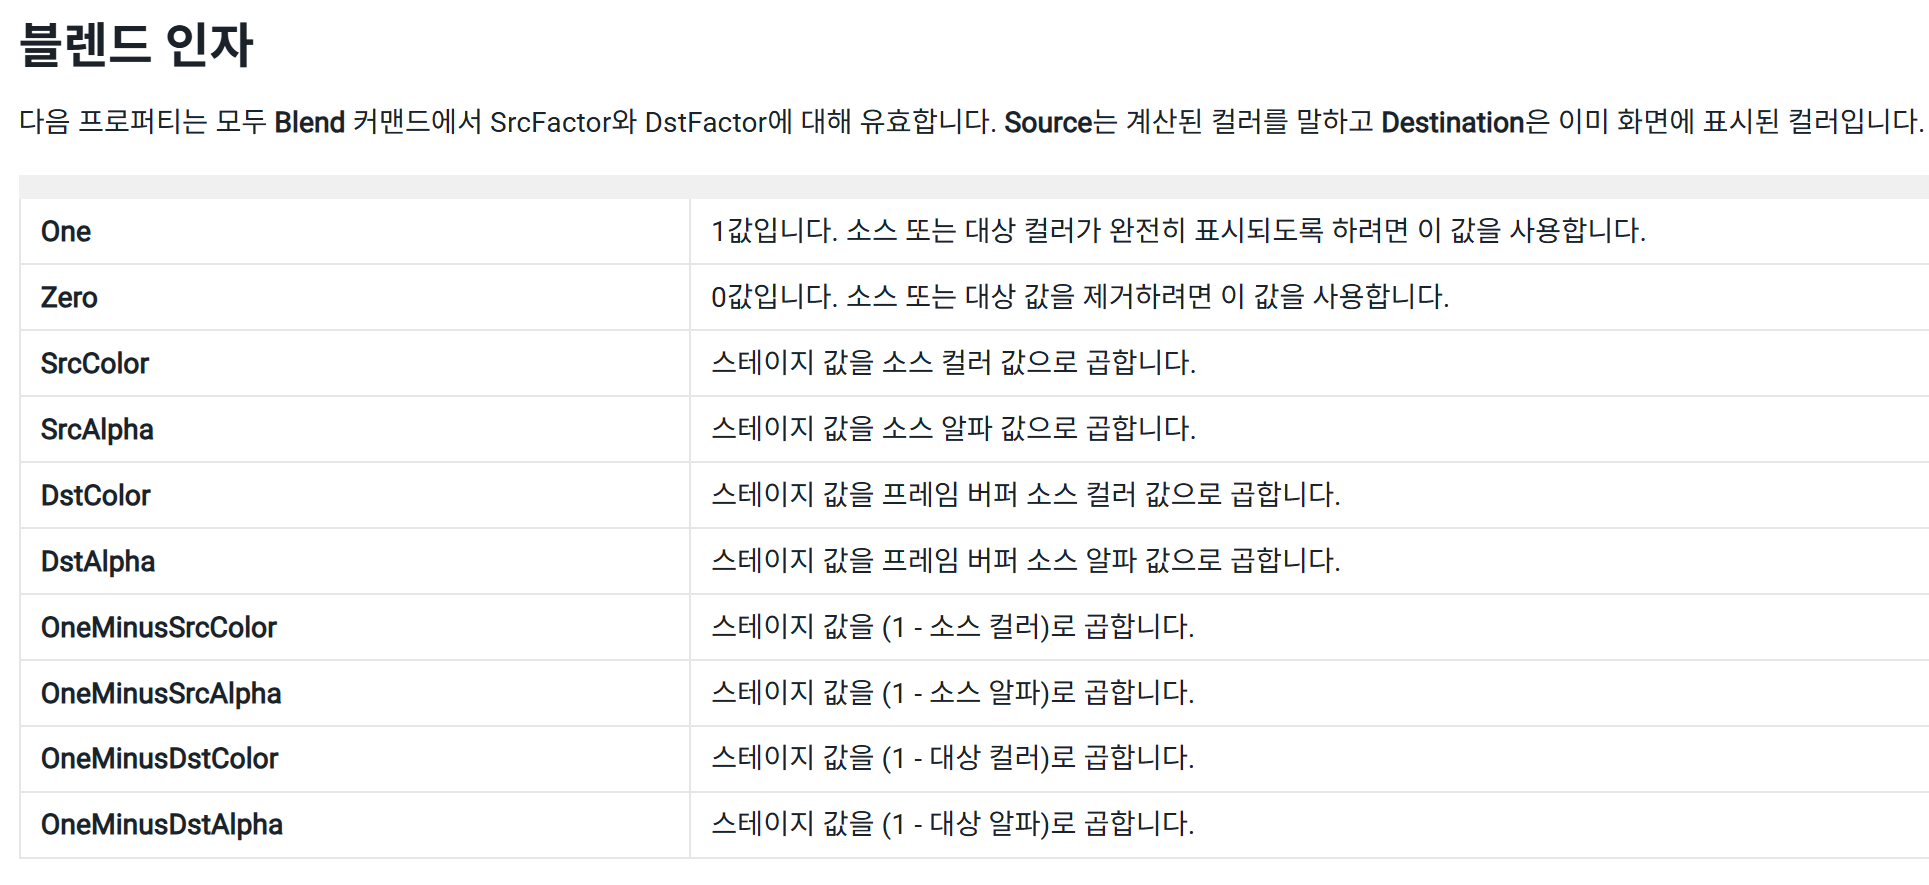
Alpha Blending
* Blend SrcFactor DstFactor : 배경 색깔과 현재 색깔을 어떻게 더할지 정의
* Blend One One : 소스색 + 배경색
* Blend SrcAlpha OneMinusSrcAlpha : 소스색 *알파 + 배경색* (1 - 알파)
* Blend DstColor Zero : 소스색 *배경색 + 배경색* 0
* 이것들은 파티클 시스템에 자주 쓰이는데, 내장 셰이더 중 Particles에 블렌딩 종류가 미리 만들어져있다. (현재는 legacy로 옮겨짐)
```cpp
SubShader {
Tags {"Queue" = "Transparent"}
Pass {
Blend DstColor Zero
SetTexture [_MainTex] { combine texture }
}
}
```
* Cull Off를 넣으면 뒷면도 렌더링해준다
### Decal
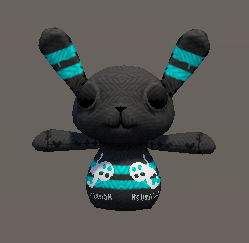
```cpp
Properties {
_MainTex ("MainTex", 2D) = "white" {}
_DecalTex ("Decal", 2D) = "white" {}
[Toggle] _ShowDecal("Show Decal?", Float) = 0
}
(생략)
void surf(Input IN, inout SurfaceOutput o) {
fixed4 a = tex2D(_MainTex, IN.uv_MainTex);
fixed4 b = tex2D(_DecalTex, IN.uv_MainTex) * _ShowDecal;
o.Albedo = b.r > 0.9 ? b.rgb : a.rgb;
}
```
* Properties에는 bool 못 쓴다 (대신 \[Toggle] 붙이고 float 0,1로 관리)
```cs
void Start()
{
mat = this.GetComponent().sharedMaterial;
}
public void OnMouseDown()
{
showDecal = !showDecal;
if (showDecal)
mat.SetFloat("_ShowDecal", 1);
else
mat.SetFloat("_ShowDecal", 0);
}
```
c# 코드로 decal 표시 제어하는 연습\
(OnMouseDown()은 deprecated됐길래 Player Input으로 받음)
### Stencil hole
```cpp
Tags {"Queue" = "Geometry-1"}
ColorMask 0
ZWrite Off
Stencil
{
Ref 1 // 기준값
Comp always // 스텐실 테스트 (렌더링 할지말지)
Pass replace // 테스트 통과하면 뭐 할건지
}
```
Hole.shader
```cpp
Tags { "Queue" = "Geometry" }
Stencil
{
Ref 1
Comp notequal // 스텐실이 1이랑 다르면 그린다
Pass keep // Comp 통과하면 스텐실 값 그대로 둔다
}
```
Wall.shader
### Stencil magic window
```cpp
Shader "Holistic/StencilWindow"
{
Properties
{
_SRef("Stencil Ref", Float) = 1
[Enum(UnityEngine.Rendering.CompareFunction)] _SComp("Stencil Comp", Float) = 8
[Enum(UnityEngine.Rendering.StencilOp)] _SOp("Stencil Op", Float) = 2
}
SubShader
{
Tags{ "Queue" = "Geometry-1" }
ZWrite Off
ColorMask 0
Stencil
{
Ref[_SRef]
Comp[_SComp]
Pass[_SOp]
}
CGPROGRAM
(생략)
ENDCG
}
}
```
StencilWindow\.shader
* stencil만 쓰더라도 더미용 CGPROGRAM 코드는 작성해주어야 한다
* `[Enum(...)]`을 붙이면 머테리얼 인스펙터에서 드롭다운으로 노출된다
```cpp
Properties {
_SRef("Stencil Ref", Float) = 1
[Enum(UnityEngine.Rendering.CompareFunction)] _SComp("Stencil Comp", Float) = 8
[Enum(UnityEngine.Rendering.StencilOp)] _SOp("Stencil Op", Float) = 2
}
SubShader {
Stencil
{
Ref[_SRef]
Comp[_SComp]
Pass[_SOp]
}
```
StencilObject.shader
* 각 스텐실 값에 해당하는 영역만 그리도록 Stencil Ref를 설정
* 어색함을 줄이려면 Renderer에서 Receive Shadows 끄기
#### Exception for CGPROGRAM
```cpp
SubShader {
Tags {"Queue" = "Transparent"}
Pass {
Blend DstColor Zero
SetTexture [_MainTex] { combine texture }
}
}
```
이건 Pass만 적어도 되는 이유?
* OpenGL 1.x / DirectX 8 시절에 쓰이던, 프로그래머가 셰이더 코드를 직접 안 짜도 되는 방식의 셰이더.\
Unity는 이 형식도 여전히 지원하고 있고, 아주 기본적인 작업 (텍스처 입히기, 블렌딩 등)엔 이 구조만으로도 충분함.
* surface shader나 URP/HDRP에서는 무조건 CGPROGRAM \~ ENDCG 사이에 HLSL 코드 써야 함
### Basic vertex shader
`struct appdata`는 World Space의 데이터를 들고 있다.\
vert 함수는 `struct appdata`를 조작하여 `struct v2f`로 보낸다.\
`struct v2f`는 Clipping Space의 데이터를 들고 있다.\
frag 함수는 `struct v2f`를 조작하여 최종적으로 렌더링한다.
```cpp
Shader "Unlit/BasicVF"
{
Properties
{
_MainTex ("Texture", 2D) = "white" {}
}
SubShader
{
Tags { "RenderType"="Opaque" }
LOD 100
Pass
{
CGPROGRAM
#pragma vertex vert
#pragma fragment frag
#pragma multi_compile_fog // fog 사용하겠다는 뜻
#include "UnityCG.cginc" // 셰이더 작성 도와주는 메서드나 변수들 담겨있음
// vertex shader에서 사용할 구조체
// appdata는 UnityCG.cginc에 정의되어 있음
struct appdata
{
float4 vertex : POSITION; // 정점의 3차원 위치
// (x,y,z,w)에서 w는 homogeneous coordinate
// homogeneous coordinate를 통해 클립 공간을 계산함
float2 uv : TEXCOORD0; // 정점의 2차원 uv 좌표
};
// fragment shader에서 사용할 구조체
// v2f는 vertex to fragment의 약자
// vertex shader에서 fragment shader로 넘겨줄 데이터 구조체
struct v2f
{
float2 uv : TEXCOORD0; // vertex shader에서 계산한 텍스쳐 좌표
// TEXCOORD1은 두 번째 텍스쳐 uv
UNITY_FOG_COORDS(1) // fog coordinate를 사용하기 위한 매크로
float4 vertex : SV_POSITION; // clip space에서의 정점 위치
// clip space 좌표는 화면에 그려질 위치를 결정함
};
sampler2D _MainTex;
float4 _MainTex_ST; // 텍스쳐 scale, offset 정보
v2f vert (appdata v)
{
v2f o;
o.vertex = UnityObjectToClipPos(v.vertex);
o.uv = TRANSFORM_TEX(v.uv, _MainTex);
UNITY_TRANSFER_FOG(o,o.vertex);
return o;
}
fixed4 frag (v2f i) : SV_Target
{
fixed4 col = tex2D(_MainTex, i.uv);
UNITY_APPLY_FOG(i.fogCoord, col);
return col;
}
ENDCG
}
}
}
```
appdata 구조체 (버텍스 셰이더 입력 데이터)
* `float4 vertex : POSITION;`: 정점의 위치
* `float3 normal : NORMAL;`: 정점의 법선 벡터
* `float4 tangent : TANGENT;`: 정점의 탄젠트 벡터
* `float2 uv : TEXCOORD0;`: 첫 번째 텍스처 좌표
* `float2 uv1 : TEXCOORD1;`: 두 번째 텍스처 좌표
* `float4 color : COLOR;`: 정점의 색상
v2f 구조체 (버텍스 셰이더에서 프래그먼트 셰이더로 전달되는 데이터)
* `float4 vertex : SV_POSITION;`: 클립 공간에서의 정점 위치
* `float2 uv : TEXCOORD0;`: 보간된 텍스처 좌표
* `float3 normal : NORMAL;`: 보간된 법선 벡터
* `float4 color : COLOR;`: 보간된 색상
* `UNITY_FOG_COORDS(1);`: 안개 효과를 위한 좌표
* `float3 worldPos : TEXCOORD2;`: 월드 공간에서의 정점 위치
### Color with vertex

```cpp
v2f vert (appdata v)
{
v2f o;
o.vertex = UnityObjectToClipPos(v.vertex);
o.color.r = (v.vertex.x+5)/20;
return o;
}
```

```cpp
fixed4 frag (v2f i) : SV_Target
{
fixed4 col = i.color;
col.r = (i.vertex.x+10)/10;
col.g = (i.vertex.y+10)/10;
return col;
}
```
frag 함수로 같은 코드를 짜면\
clipping space에 있기 때문에 +10, /10으로는 0\~1 값을 얻어낼 수 없다.
그리고 가로, 세로, 높이 순서가\
world space에선 x,z,y 순이라면\
clipping space에서는 x,y,z 순이다.
```cpp
fixed4 frag (v2f i) : SV_Target
{
fixed4 col;
col.r = i.vertex.x/1000;
return col;
}
```
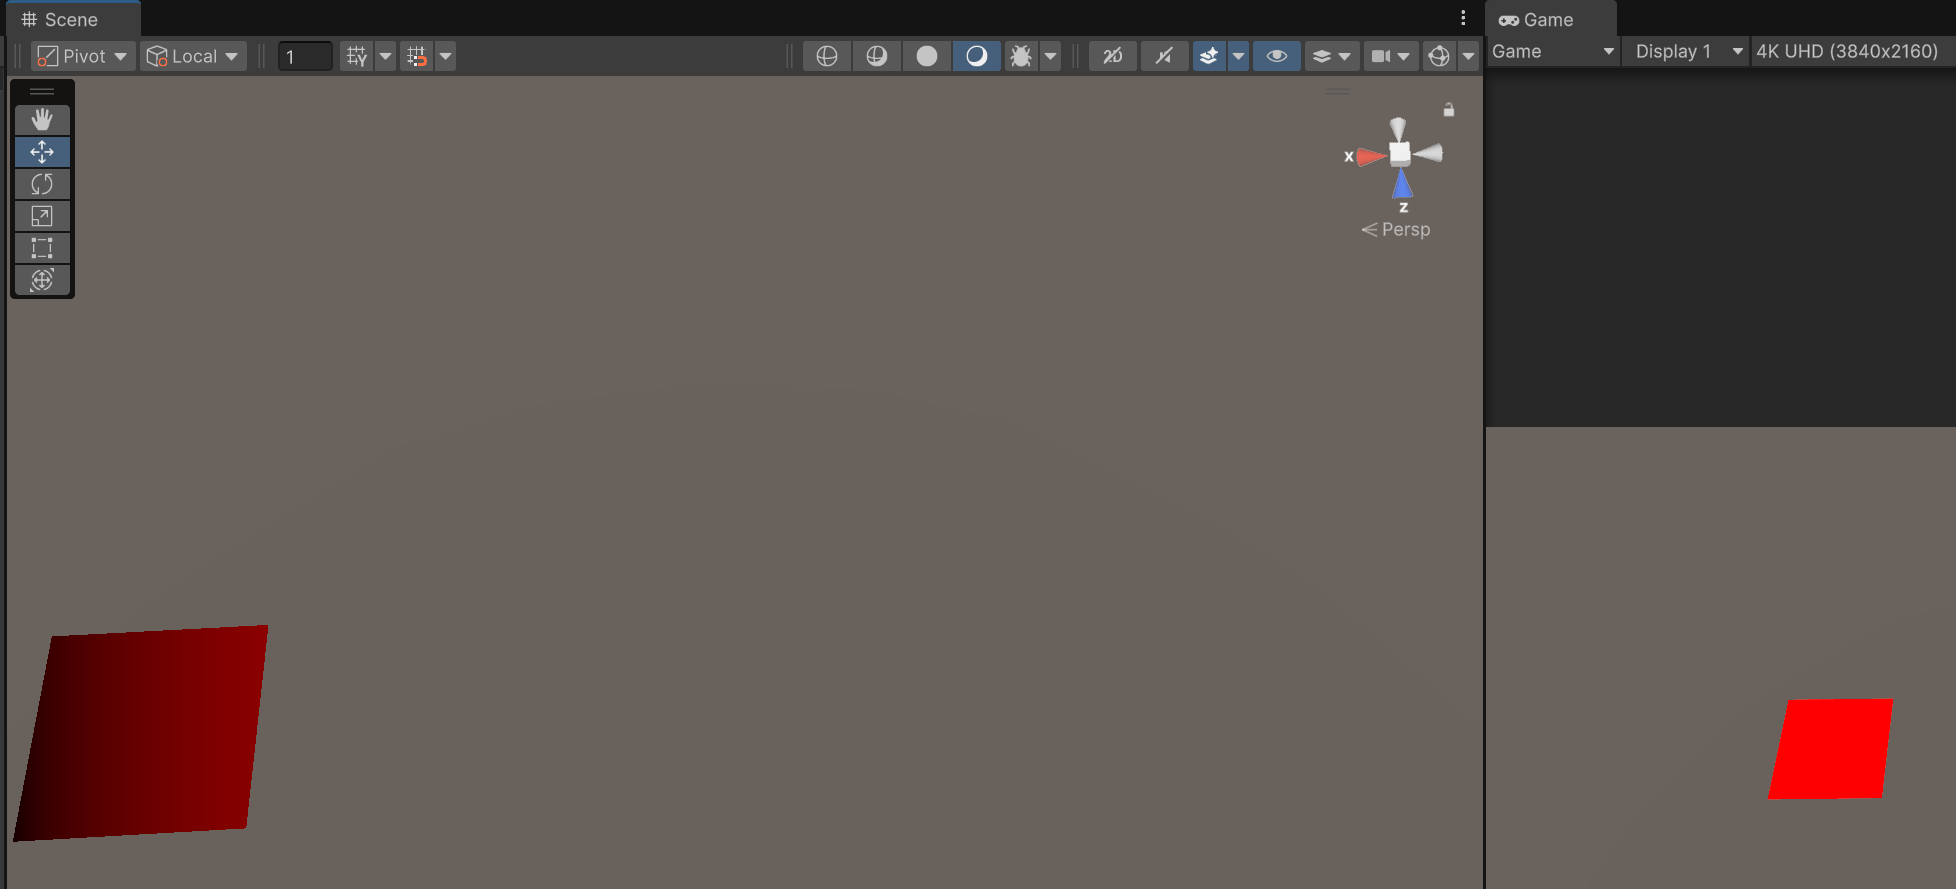
같은 오브젝트여도 scene view와 game view의 clipping space가 달라\
다른 색깔이 표현되는 것을 볼 수 있다.
### Material use
```cpp
v2f vert (appdata v)
{
v2f o;
o.vertex = UnityObjectToClipPos(v.vertex);
o.uv = TRANSFORM_TEX(v.uv, _MainTex);
o.uv.x = sin(o.uv.x * _ScaleUVX);
return o;
}
```
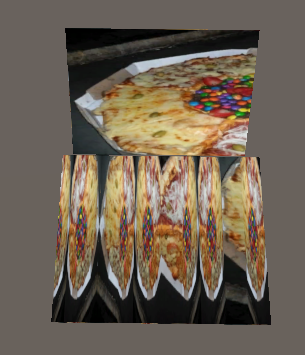
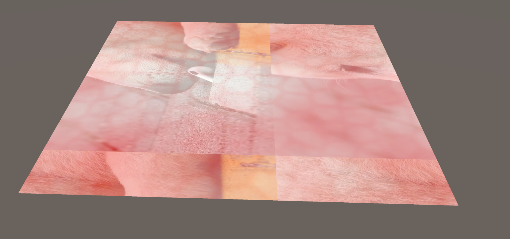
위는 quad, 아래는 plane이다.
plane의 uv는 0\~10까지 있고, 텍스쳐가 반복되도록 설계돼있다.
```cpp
SubShader
{
Tags{ "Queue" = "Transparent"}
GrabPass{}
Pass
{
(생략)
fixed4 frag (v2f i) : SV_Target
{
fixed4 col = tex2D(_GrabTexture, i.uv);
return col;
}
ENDCG
}
}
```
`GrabPass{}`를 앞에 삽입하면 `_GrabTexture`로 화면을 찍을 수 있다.\
render queue는 Transparent로 설정하여 뒤에 있는 물체도 찍게 함.
### Basic Lambert
```cpp
SubShader
{
Pass
{
Tags {"LightMode"="ForwardBase"}
CGPROGRAM
#pragma vertex vert
#pragma fragment frag
#include "UnityCG.cginc"
#include "UnityLightingCommon.cginc"
struct appdata
{
float4 vertex : POSITION;
float3 normal : NORMAL;
float4 texcoord : TEXCOORD0;
};
struct v2f
{
float2 uv : TEXCOORD0;
fixed4 diff : COLOR0;
float4 vertex : SV_POSITION;
};
sampler2D _MainTex;
float4 _MainTex_ST;
// 램버트 모델로 빛 세기 계산
v2f vert (appdata v)
{
v2f o;
o.vertex = UnityObjectToClipPos(v.vertex);
o.uv = v.texcoord;
half3 worldNormal = UnityObjectToWorldNormal(v.normal); // 노말을 월드 좌표계로 변환
half nl = max(0, dot(worldNormal, _WorldSpaceLightPos0.xyz)); // 광원 방향과 노말의 내적
o.diff = nl * _LightColor0; // 광원 색상과 내적값을 곱하여 diffuse 색상 계산
return o;
}
// 텍스쳐랑 빛 세기 곱하기
fixed4 frag (v2f i) : SV_Target
{
fixed4 col = tex2D(_MainTex, i.uv);
col *= i.diff;
return col;
}
ENDCG
}
}
```
### Cast shadow

램버트에 패스 추가
```cpp
Pass
{
Tags {"LightMode"="ShadowCaster"}
CGPROGRAM
#pragma vertex vert
#pragma fragment frag
#pragma multi_compile_shadowcaster
#include "UnityCG.cginc"
struct appdata {
float4 vertex : POSITION;
float3 normal : NORMAL;
float4 texcoord : TEXCOORD0;
};
struct v2f {
V2F_SHADOW_CASTER;
};
v2f vert(appdata v)
{
v2f o;
TRANSFER_SHADOW_CASTER_NORMALOFFSET(o); // 그림자 데이터 생성
return o;
}
float4 frag(v2f i) : SV_Target
{
SHADOW_CASTER_FRAGMENT(i); // 그림자 받았다면 색상 변환
}
ENDCG
}
```
함수 호출로 유니티가 그림자 대신 계산해줌
### Receive shadow
```cpp
Pass
{
Tags {"LightMode"="ForwardBase"}
CGPROGRAM
#pragma vertex vert
#pragma fragment frag
// directional light와 실시간 그림자만 고려하겠다는 뜻
#pragma multi_compile_fwdbase nolightmap nodirlightmap nodynlighmap novertexlight
#include "UnityCG.cginc"
#include "UnityLightingCommon.cginc"
#include "Lighting.cginc"
#include "AutoLight.cginc"
struct appdata
{
float4 vertex : POSITION;
float3 normal : NORMAL;
float4 texcoord : TEXCOORD0;
};
struct v2f
{
float2 uv : TEXCOORD0;
fixed4 diff : COLOR0;
// vertex에서 post로 바꾼 이유 : TRANSFER_SHADOW()가 vertex가 아닌 pos를 찾기 때문
float4 pos : SV_POSITION;
SHADOW_COORDS(1) // 그림자 좌표들을 계산
};
sampler2D _MainTex;
float4 _MainTex_ST;
// 램버트 모델로 빛 세기 계산
v2f vert (appdata v)
{
v2f o;
o.pos = UnityObjectToClipPos(v.vertex);
o.uv = v.texcoord;
half3 worldNormal = UnityObjectToWorldNormal(v.normal);
half nl = max(0, dot(worldNormal, _WorldSpaceLightPos0.xyz));
o.diff = nl * _LightColor0;
TRANSFER_SHADOW(o); // 그림자를 월드 좌표계에서 frag를 위한 좌표계로 변환
return o;
}
// 텍스쳐랑 빛 세기 곱하기
fixed4 frag (v2f i) : SV_Target
{
fixed4 col = tex2D(_MainTex, i.uv);
fixed shadow = SHADOW_ATTENUATION(i); // 그림자 세기 계산
col *= i.diff * shadow;
return col;
}
ENDCG
}
```
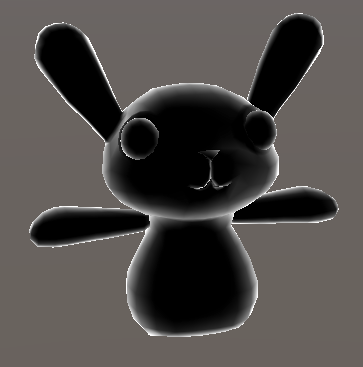
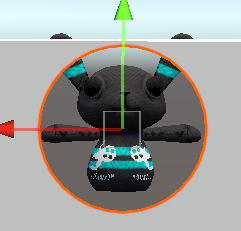
### Vertex extruding
```cpp
SubShader {
CGPROGRAM
#pragma surface surf Lambert vertex:vert
struct Input {
float2 uv_MainTex;
};
// 원래라면 유니티가 알아서 appdata 선언하는데,
// vert 함수를 사용자가 작성하였으므로
// texcoord를 선언하지 않으면 uv를 넘겨줄 수 없음
struct appdata {
float4 vertex: POSITION;
float3 normal: NORMAL;
float4 texcoord: TEXCOORD0;
};
float _Amount;
void vert (inout appdata v) {
v.vertex.xyz += v.normal * _Amount;
}
// fragment shader는 유니티가 알아서 처리해준다.
// compile and show code로 확인 가능
sampler2D _MainTex;
void surf (Input IN, inout SurfaceOutput o) {
o.Albedo = tex2D (_MainTex, IN.uv_MainTex).rgb;
}
ENDCG
}
```
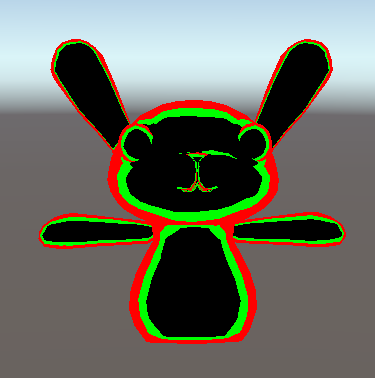
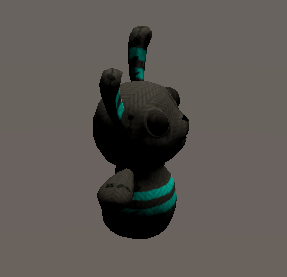
### Simple Outline
```cpp
SubShader {
Tags { "Queue" = "Transparent" }
// Z buffer를 안 쓰면 배경에 가려짐
// 그래서 RenderQueue를 Transparent로 해야됨
// 그래도 다른 오브젝트에 가려지긴 함.
// Zwrite만 안 하는거지 자기 depth 값으로 Ztest는 하기 때문.
ZWrite Off
CGPROGRAM
#pragma surface surf Lambert vertex:vert
struct Input {
float2 uv_MainTex;
};
float _Outline;
float4 _OutlineColor;
void vert (inout appdata_full v) {
v.vertex.xyz += v.normal * _Outline;
}
sampler2D _MainTex;
void surf(Input IN, inout SurfaceOutput o)
{
o.Emission = _OutlineColor.rgb;
}
ENDCG
ZWrite On
CGPROGRAM
#pragma surface surf Lambert
struct Input {
float2 uv_MainTex;
};
sampler2D _MainTex;
void surf (Input IN, inout SurfaceOutput o) {
o.Albedo = tex2D(_MainTex, IN.uv_MainTex).rgb;
}
ENDCG
}
```
* 유니티가 Surface Shader를 해석해서 Pass {}를 만들어줌.
* `appdata_full` : 미리 정의된 버텍스 입력 구조체. 직접 필요한거 선언 안해도 됨.
```cpp
SubShader {
Tags { "Queue" = "Transparent" }
CGPROGRAM
#pragma surface surf Lambert
struct Input {
float2 uv_MainTex;
};
sampler2D _MainTex;
void surf (Input IN, inout SurfaceOutput o) {
o.Albedo = tex2D(_MainTex, IN.uv_MainTex).rgb;
}
ENDCG
Pass {
Cull Front
CGPROGRAM
#pragma vertex vert
#pragma fragment frag
#include "UnityCG.cginc"
struct appdata {
float4 vertex : POSITION;
float3 normal : NORMAL;
};
struct v2f {
float4 pos : SV_POSITION;
fixed4 color : COLOR;
};
float _Outline;
float4 _OutlineColor;
v2f vert(appdata v) {
v2f o;
// vertex 위치를 clipping space 위치로 변환
o.pos = UnityObjectToClipPos(v.vertex);
// normal을 view space로 변환
float3 norm = normalize(mul ((float3x3)UNITY_MATRIX_IT_MV, v.normal));
// normal.xy를 clipping space로 변환
float2 offset = TransformViewToProjection(norm.xy);
// o.pos.z를 곱하는 이유 : 멀리 있는 것도 두께 일정해지도록
o.pos.xy += offset * o.pos.z * _Outline;
o.color = _OutlineColor;
return o;
}
fixed4 frag(v2f i) : SV_Target
{
return i.color;
}
ENDCG
}
}
```
### Glass with distortion
```cpp
Shader "Holistic/Glass"
{
Properties
{
_MainTex("Texture", 2D) = "white" {}
_BumpMap("Normalmap", 2D) = "bump" {}
_ScaleUV("Scale", Range(1,1000)) = 1
}
SubShader
{
Tags{"Queue" = "Transparent"}
GrabPass{}
Pass
{
CGPROGRAM
#pragma vertex vert
#pragma fragment frag
#include "UnityCG.cginc"
struct appdata
{
float4 vertex : POSITION;
float4 uv : TEXCOORD0;
};
struct v2f
{
float2 uv : TEXCOORD0;
float4 uvgrab : TEXCOORD1;
float2 uvbump : TEXCOORD2;
float4 vertex : SV_POSITION;
};
sampler2D _GrabTexture;
float4 _GrabTexture_TexelSize;
sampler2D _MainTex;
float4 _MainTex_ST;
sampler2D _BumpMap;
float4 _BumpMap_ST;
float _ScaleUV;
v2f vert (appdata v)
{
v2f o;
// vertex의 좌표를 클립 공간으로 변환
o.vertex = UnityObjectToClipPos(v.vertex);
// 그래픽 API별 Y축 방향 차이를 보정
#if UNITY_UV_STARTS_AT_TOP
float scale = -1.0;
#else
float scale = 1.0;
#endif
// 투영 좌표 : z(깊이)가 커질수록 → x/w, y/w 값이 작아지게 하여 원근감 표현
// 클립 공간의 x, y를 변환하여 투영 텍스쳐 좌표 생성
o.uvgrab.xy = (float2(o.vertex.x, o.vertex.y*scale) + o.vertex.w) * 0.5;
// tex2Dproj 호출에 필요한 z/w 보간과 w 값 보존을 위해 그대로 전달
o.uvgrab.zw = o.vertex.zw;
// 텍스쳐 uv에 타일링과 오프셋 적용
o.uv = TRANSFORM_TEX(v.uv, _MainTex);
o.uvbump = TRANSFORM_TEX(v.uv, _BumpMap);
return o;
}
// SV_Target: 픽셀 셰이더의 반환값이 최종 화면(또는 렌더 타겟)의 픽셀 색상임을 명시
fixed4 frag (v2f i) : SV_Target
{
half2 bump = UnpackNormal(tex2D(_BumpMap, i.uvbump)).rg;
// _GrabTexture_TexelSize.xy는 UV 기준으로 "1픽셀"이 얼마인지를 알려주는 값이며,
// 이걸 곱해야 왜곡 효과가 해상도에 관계없이 자연스럽게 작동
float2 offset = bump * _ScaleUV * _GrabTexture_TexelSize.xy;
i.uvgrab.xy = offset * i.uvgrab.z + i.uvgrab.xy;
// tex2Dproj : 투영 텍스쳐 좌표를 이용해 샘플링
fixed4 col = tex2Dproj(_GrabTexture, i.uvgrab);
float4 tint = tex2D(_MainTex, i.uv);
col *= tint;
return col;
}
ENDCG
}
}
}
```
tex2D와 tex2DProj의 차이
| 항목 | `tex2D` | `tex2Dproj` |
| ----- | ----------------- | ---------------------------------------- |
| 입력 타입 | `float2` (UV) | `float4` (투영 좌표) |
| 내부 동작 | 그대로 사용 | `(x / w, y / w)`로 계산 |
| 보간 방식 | 선형 보간 (float2 기준) | **투영 보간** (정점 간의 w 보정 포함) |
| 사용 목적 | 일반적인 UV 샘플링 | GrabPass, Projector, ShadowMap 등 투영 필요 시 |
| 필요 조건 | 일반 텍스처 좌표만 있으면 됨 | 클립 공간 또는 투영 좌표 필요 |
| 예시 사용 | 일반 메시 텍스처, 라이트맵 등 | 화면 왜곡, 그림자 투사, 스크린 공간 이펙트 등 |
시스템 예약 시맨틱(System Semantic)\
: 각 셰이더 단계에서 "이 값이 어떤 용도로 쓰이는지" GPU에게 알려준다.
| 시맨틱 | 의미 |
| --------------- | --------------------- |
| `SV_Position` | 정점 셰이더의 출력 위치 (클립 공간) |
| `SV_Target` | 픽셀 셰이더의 출력 색상 |
| `SV_Depth` | 픽셀 셰이더가 직접 깊이값을 쓸 때 |
| `SV_VertexID` | 정점 인덱스 |
| `SV_InstanceID` | 인스턴싱된 개체의 ID |
### Waves

```cpp
void vert (inout appdata v, out Input o) {
UNITY_INITIALIZE_OUTPUT(Input,o); // o 구조체 멤버 0 또는 기본값으로 초기화
float t = _Time * _Speed; // _Time은 유니티 자체 변수
float waveHeight = sin(t + v.vertex.x * _Freq) * _Amp;
v.vertex.y = v.vertex.y + waveHeight;
// vertex 값을 변경했으니 normal도 그에 맞게 변경 (정확한 계산은 아님)
v.normal = normalize(float3(v.normal.x + waveHeight, v.normal.y, v.normal.z));
o.vertColor = waveHeight + 2; // 약속된 이름은 아니고 데이터 넘기기 위해 Input에 선언
}
sampler2D _MainTex;
void surf (Input IN, inout SurfaceOutput o) {
float4 c = tex2D(_MainTex, IN.uv_MainTex);
o.Albedo = c * IN.vertColor.rgb;
}
```
### Scroll texture
```cpp
void surf(Input IN, inout SurfaceOutput o) {
_ScrollX *= _Time;
_ScrollY *= _Time;
float3 water = (tex2D(_MainTex, IN.uv_MainTex + float2(_ScrollX, _ScrollY))).rgb;
float3 foam = (tex2D(_FoamTex, IN.uv_MainTex + float2(_ScrollX/2.0, _ScrollY/2.0))).rgb;
o.Albedo = (water+foam)/2.0;
}
```
### Plasma
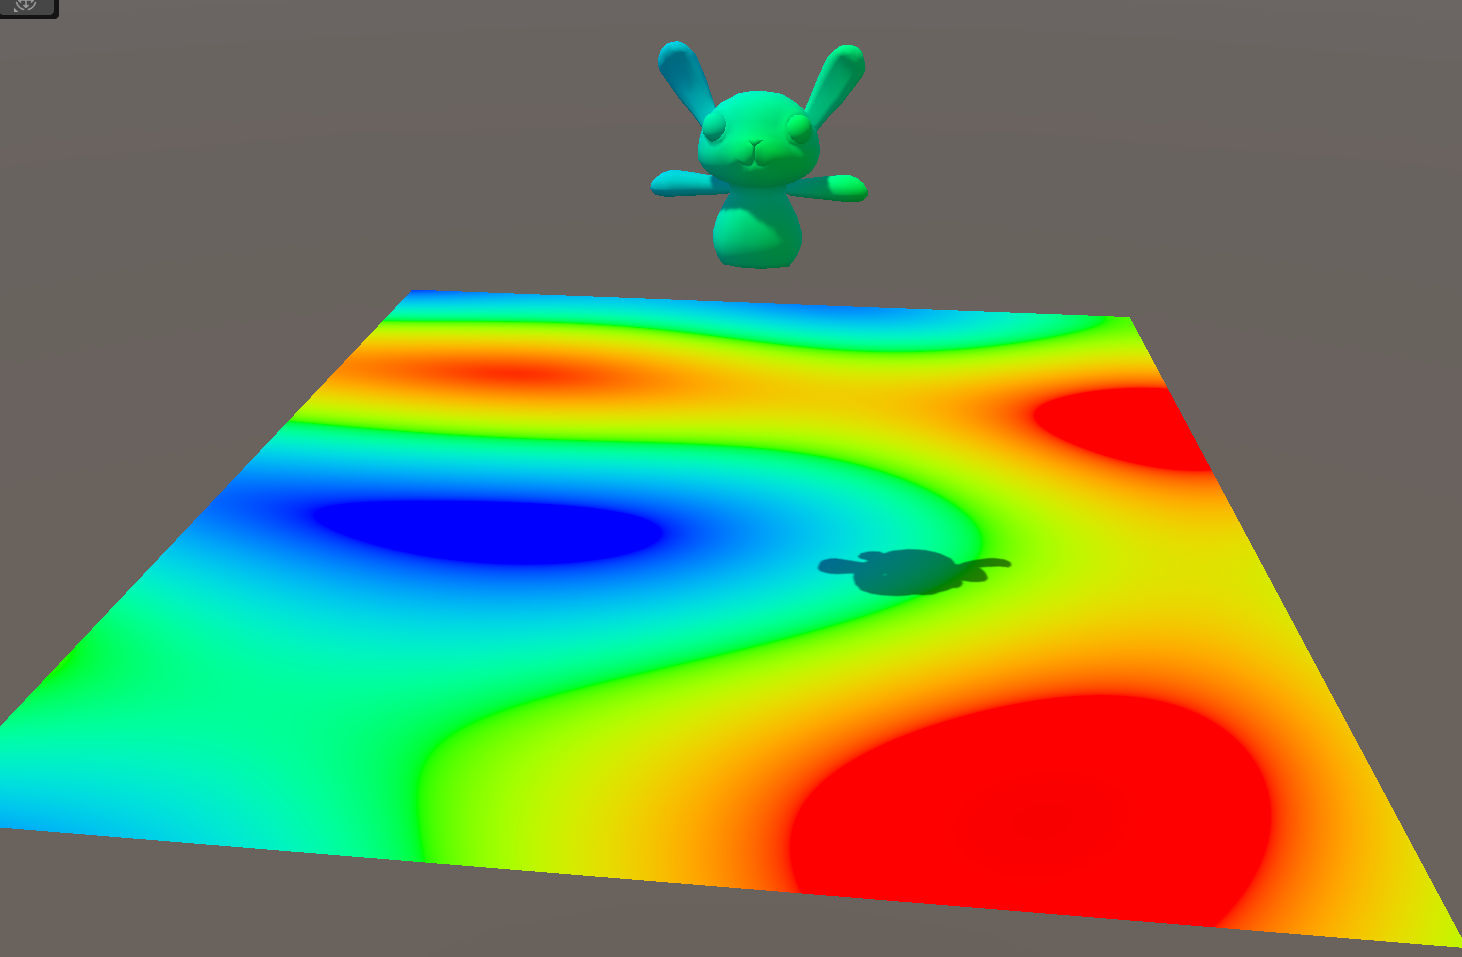
```cpp
void surf (Input IN, inout SurfaceOutput o) {
const float PI = 3.14159265;
float t = _Time.x * _Speed;
//vertical
float c = sin(IN.worldPos.x * _Scale1 + t);
//horizontal
c += sin(IN.worldPos.z * _Scale2 + t);
//diagonal
c+= sin(_Scale3*(IN.worldPos.x*sin(t/2.0) + IN.worldPos.z*cos(t/3))+t);
//circular
float c1 = pow(IN.worldPos.x + 0.5 * sin(t/5),2);
float c2 = pow(IN.worldPos.z + 0.5 * cos(t/3),2);
c += sin(sqrt(_Scale4*(c1+c2)+1+t));
o.Albedo.r = sin(c/4.0*PI);
o.Albedo.g = sin(c/4.0*PI + 2*PI/4);
o.Albedo.b = sin(c/4.0*PI + 4*PI/4);
o.Albedo *= _Tint;
}
```
surface shader
```cpp
SubShader
{
CGPROGRAM
#pragma vertex vert
#pragma fragment frag
#include "UnityCG.cginc"
struct appdata
{
float4 vertex : POSITION;
};
struct v2f
{
float4 vertex : SV_POSITION;
};
float4 _Tint;
float _Speed;
float _Scale1;
float _Scale2;
float _Scale3;
float _Scale4;
v2f vert (appdata v)
{
v2f o;
o.vertex = UnityObjectToClipPos(v.vertex);
return o;
}
fixed4 frag (v2f i) : SV_Target
{
fixed4 col;
const float PI = 3.14159265;
float t = _Time.x * _Speed;
//these are screen coordinates so
//get them down to small values for the
//sin to use
float xpos = i.vertex.x * 0.001;
float ypos = i.vertex.y * 0.001;
//vertical
float c = sin(xpos * _Scale1 + t);
//horizontal
c += sin(ypos * _Scale2 + t);
//diagonal
c += sin(_Scale3*(xpos*sin(t/2.0) + ypos*cos(t/3))+t);
//circular
float c1 = pow(xpos + 0.5 * sin(t/5),2);
float c2 = pow(ypos + 0.5 * cos(t/3),2);
c += sin(sqrt(_Scale4*(c1 + c2)+1+t));
col.r = sin(c/4.0*PI);
col.g = sin(c/4.0*PI + 2*PI/4);
col.b = sin(c/4.0*PI + 4*PI/4);
return col;
}
ENDCG
}
```
vertex/fragment shader
**IN.worldPos**는 월드 좌표계 (World Space) 위치\
i.vertex는 SV\_POSITION, 즉 클립 공간(Screen Space) 상 위치
### Ray marching

```cpp
SubShader
{
Tags { "Queue" = "Transparent" }
Blend SrcAlpha OneMinusSrcAlpha
Pass
{
CGPROGRAM
#pragma vertex vert
#pragma fragment frag
#include "UnityCG.cginc"
struct appdata
{
float4 vertex : POSITION;
float2 uv : TEXCOORD0;
};
struct v2f
{
float3 wPos : TEXCOORD0;
float4 pos : SV_POSITION; // 사용 안 해도 이걸(클립 공간 좌표) 반환해야 렌더링 가능
};
// 1. 정점을 월드 좌표로 변환하여 반환
v2f vert (appdata v)
{
v2f o;
o.pos = UnityObjectToClipPos(v.vertex);
o.wPos = mul(unity_ObjectToWorld, v.vertex).xyz;
return o;
}
#define STEPS 64 // 광선이 몇단계까지 뻗어나갈지
#define STEP_SIZE 0.01 // 광선 각 단계의 길이
// 4. 구 안에 들어왔는지 아닌지 판단
bool SphereHit(float3 p, float3 centre, float radius)
{
return distance(p, centre) < radius;
}
// 3. 구에 맞았는지 아닌지 판단
float RaymarchHit(float3 position, float3 direction)
{
for(int i = 0; i < STEPS; i++)
{
// wPos를 받았으므로, 큐브 또한 (0,0,0)에 위치시켜야 한다
if (SphereHit(position, float3(0,0,0), 0.5))
return position;
position += direction * STEP_SIZE;
}
return 0;
}
// 2. 구를 감지했다면 그리고, 없다면 안 그린다
fixed4 frag (v2f i) : SV_Target
{
float3 viewDirection = normalize(i.wPos - _WorldSpaceCameraPos);
float3 worldPosition = i.wPos;
float depth = RaymarchHit(worldPosition, viewDirection);
if(depth != 0)
return fixed4(1,0,0,1);
else
return fixed4(1,1,1,0);
}
ENDCG
}
}
```
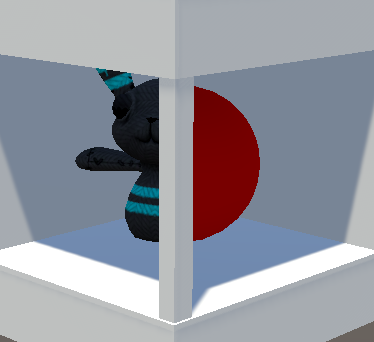
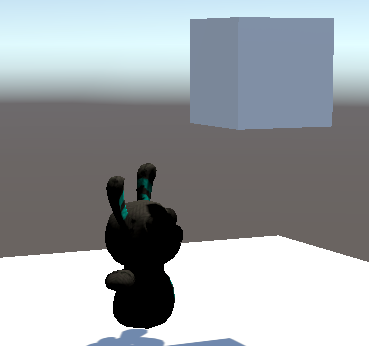
실제 ray marching과는 살짝 다른, 교육적 효과를 위한 예제

Cube의 크기를 키우면 뻗어나간 광선의 길이가 짧아서 구를 제대로 렌더링하지 못한다.\
STEPS를 늘리면 해결된다.

STEP\_SIZE를 늘리면 제대로 감지하지 못하고 넘어가는 부분이 생긴다.
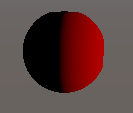
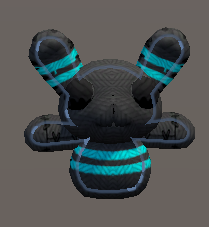
frag shader의 return을 `fixed4(depth,0,0,1)`으로 바꾸면 이렇게 보인다.
현재는 카메라의 위치에 관계없이 반으로 나뉘어 보인다.\
ray marching의 광선 방향도 문제가 있지만,
```cpp
float RaymarchHit(float3 position, float3 direction)
{
for(int i = 0; i < STEPS; i++)
{
// wPos를 받았으므로, 큐브 또한 (0,0,0)에 위치시켜야 한다
if (SphereHit(position, float3(0,0,0), 0.5))
return position;
position += direction * STEP_SIZE;
}
return 0;
}
```
float로 x 좌표만 내보내게되던 기존 코드를

```cpp
// 3. 구에 맞았는지 아닌지 판단
float3 RaymarchHit(float3 position, float3 direction)
{
for(int i = 0; i < STEPS; i++)
{
// wPos를 받았으므로, 큐브 또한 (0,0,0)에 위치시켜야 한다
if (SphereHit(position, float3(0,0,0), 0.5))
return position;
position += direction * STEP_SIZE;
}
return float3(0,0,0);
}
// 2. 구를 감지했다면 그리고, 없다면 안 그린다
fixed4 frag (v2f i) : SV_Target
{
float3 viewDirection = normalize(i.wPos - _WorldSpaceCameraPos);
float3 worldPosition = i.wPos;
float3 depth = RaymarchHit(worldPosition, viewDirection);
// return fixed4(depth,0,0,1);
if(length(depth) != 0)
return fixed4(depth.x,depth.y,depth.z,1);
else
return fixed4(1,1,1,0);
}
```
float3를 반환하게 한 뒤 그 정보를 사용하면 된다.
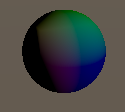
```cpp
fixed4 frag (v2f i) : SV_Target
{
float3 viewDirection = normalize(i.wPos - _WorldSpaceCameraPos);
float3 worldPosition = i.wPos;
half nl = max(0, dot(worldPosition, _WorldSpaceLightPos0.xyz)); // 광원 방향과 노말의 내적
fixed4 diff = nl * _LightColor0;
float3 depth = RaymarchHit(worldPosition, viewDirection);
if(length(depth) != 0)
{
depth *= diff;
return fixed4(depth,1);
}
else
return fixed4(1,1,1,0);
}
```
원의 normal을 기준으로 lambert를 계산하면 빛에 의한 명암도 줄 수 있다.
### Volumetric Fog
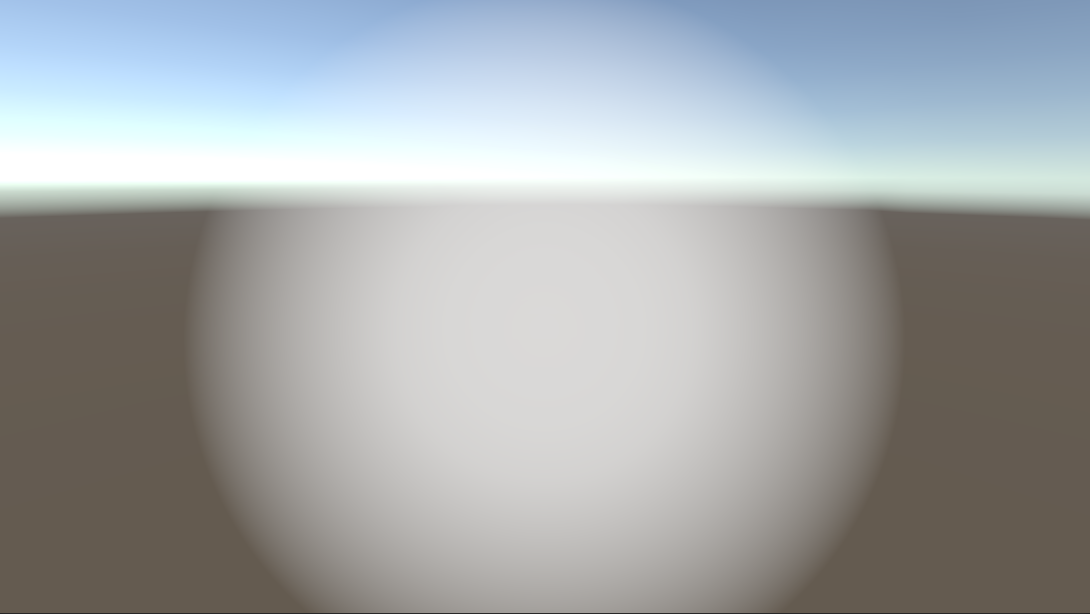
```cpp
Shader "Holistic/SphericalFog"
{
Properties
{
_FogCentre("Fog Centre/Radius", Vector) = (0,0,0,0.5) // w는 radius
_FogColor("Fog Colour", Color) = (1,1,1,1)
_InnerRatio("Inner Ratio", Range(0.0,0.9)) = 0.5
_Density("Density", Range(0.0, 1.0)) = 0.5
}
SubShader
{
Tags { "Queue"="Transparent" }
Blend SrcAlpha OneMinusSrcAlpha
Cull Off Lighting Off // 양면 렌더링, 조명 무시
ZWrite Off ZTest Always // 깊이 안 씀, 깊이 무시하고 항상 그림
Pass
{
CGPROGRAM
#pragma vertex vert
#pragma fragment frag
#include "UnityCG.cginc"
// 구의 방정식을 이용하여 교점 찾기
float CalculateFogIntensity(
float3 sphereCenter,
float sphereRadius,
float innerRatio,
float density,
float3 cameraPosition,
float3 viewDirection,
float maxDistance
)
{
// ray가 뻗어나갔을 때 sphere에 만드는 교점을 구한다.
float3 localCam = cameraPosition - sphereCenter;
float a = dot(viewDirection, viewDirection);
float b = 2 * dot ( viewDirection, localCam);
float c = dot (localCam, localCam) - sphereRadius * sphereRadius;
float d = b * b - 4 * a * c;
if(d <= 0.0f) // 교점이 없다면 0을 반환한다.
return 0;
float DSqrt = sqrt(d);
// 교차점이 카메라 뒤에 있다면 saturate
float dist = max((-b -DSqrt)/2*a, 0);
float dist2 = max((-b + DSqrt)/2*a, 0);
// backDepth는 step_distance의 계산에 사용되고,
// step_distance는 각 샘플링의 간격을 의미한다.
// backDepth가 dist2가 아닌 maxDistance가 되는 상황이라는 건
// 카메라에서 fog sphere까지의 두번째 교점이 최대 거리를 넘었다는 뜻이다.
float backDepth = min(maxDistance, dist2);
float sample = dist;
float step_distance = (backDepth - dist)/ 10;
float step_contribution = density;
float centerValue = 1/(1 - innerRatio);
float clarity = 1;
for(int seg = 0; seg < 10; seg++)
{
// position : 카메라 위치에서 시작하여 viewDirection 방향으로 step_distance만큼 이동해나감
float3 position = localCam + viewDirection * sample;
// val : 중심부에 갈수록 1에 가까워지고, 멀어지면 0이 된다.
float val = saturate(centerValue * (1 - length(position)/sphereRadius));
// fog_amount : density만큼 곱한 뒤 0~1 saturate
float fog_amount = saturate(val * step_contribution);
// clarity : fog_amount가 높으면 clarity는 낮아짐 (for문을 거치며 곱산)
clarity *= (1 - fog_amount);
sample += step_distance; // 다음 샘플링으로 넘어간다.
}
return 1 - clarity;
}
struct v2f
{
float3 view : TEXCOORD0;
float4 pos : SV_POSITION;
float4 projPos : TEXCOORD1;
};
float4 _FogCentre;
fixed4 _FogColor;
float _InnerRatio;
float _Density;
sampler2D _CameraDepthTexture;
v2f vert (appdata_base v)
{
v2f o;
float4 wPos = mul(unity_ObjectToWorld, v.vertex); // 월드 좌표
o.pos = UnityObjectToClipPos(v.vertex); // 클립 공간 좌표
o.view = wPos.xyz - _WorldSpaceCameraPos; // 카메라 기준 시선 벡터
o.projPos = ComputeScreenPos(o.pos); // depth texture에서 샘플링하기 위해 필요한 스크린 좌표
// 클립 공간에서 o.pos.z/o.pos.w는 normalized depth value를 의미
// 이 값이 0보다 크다면 해당 정점이 카메라의 앞에 있다는 뜻
float inFrontOf = (o.pos.z/o.pos.w) > 0;
// 카메라가 해당 정점의 뒤쪽에 있으면 z를 0으로 만들어 렌더링 하지 않게
o.pos.z *= inFrontOf;
return o;
}
fixed4 frag (v2f i) : SV_Target
{
half4 color = half4(1,1,1,1);
// 현재 픽셀 위치의 깊이(z값) 를 카메라 공간 기준 거리(meter 단위)로 복원
// i.projPos : ComputeScreenPos()로 만들었던 스크린 공간 좌표
// UNITY_PROJ_COORD(i.projPos) : 플랫폼마다 다르게 동작하는 투영 좌표 보정 매크로
// tex2Dproj() : 현재 픽셀의 depth 값을 _CameraDepthTexture에서 가져옴
// UNITY_SAMPLE_DEPTH() : depth 값을 플랫폼에 맞게 제대로 해석
// LinearEyeDepth() : 화면상의 픽셀이 카메라로부터 실제로 몇 미터 떨어져 있는지 계산
float depth = LinearEyeDepth(UNITY_SAMPLE_DEPTH (tex2Dproj (_CameraDepthTexture, UNITY_PROJ_COORD(i.projPos))));
float3 viewDir = normalize(i.view);
float fog = CalculateFogIntensity(
_FogCentre.xyz,
_FogCentre.w,
_InnerRatio,
_Density,
_WorldSpaceCameraPos,
viewDir,
depth
);
color.rgb = _FogColor.rgb;
color.a = fog;
return color;
}
ENDCG
}
}
}
```
### Raymarch Cloud Volume
```cpp
Shader "Holistic/RaymarchCloudsVolume"
{
Properties
{
_Scale ("Scale", Range (0.1, 10.0)) = 2.0
_StepScale ("Step Scale", Range (0.1, 100.0)) = 1
_Steps ("Steps", Range(1,200)) = 60
_MinHeight ("Min Height", Range (0.0, 5.0)) = 0
_MaxHeight ("Max Height", Range (6.0, 10.0)) = 10
_FadeDist ("Fade Distance", Range (0.0, 10.0)) = 0.5
_SunDir ("Sun Direction", Vector) = (1,0,0,0)
}
SubShader
{
Tags { "Queue"="Transparent" }
Blend SrcAlpha OneMinusSrcAlpha
Cull Off Lighting Off ZWrite Off
ZTest Always
Pass
{
CGPROGRAM
#pragma vertex vert
#pragma fragment frag
#include "UnityCG.cginc"
struct appdata
{
float4 vertex : POSITION;
float2 uv : TEXCOORD0;
};
struct v2f
{
float4 pos : SV_POSITION;
float3 view : TEXCOORD0;
float4 projPos : TEXCOORD1;
float3 wpos : TEXCOORD2;
};
float _MinHeight;
float _MaxHeight;
float _FadeDist;
float _Scale;
float _StepScale;
float _Steps;
float4 _SunDir;
sampler2D _CameraDepthTexture;
// dot(sin(value), dotDir)을 통해 위치 기반의 슈도 랜덤 값 생성. dotDir은 해시 방향 벡터.
float random(float3 value, float3 dotDir)
{
float3 smallV = sin(value);
float random = dot(smallV, dotDir);
random = frac(sin(random) * 123574.43212);
return random;
}
float3 random3d(float3 value)
{
return float3 ( random(value, float3(12.898, 68.54, 37.7298)),
random(value, float3(39.898, 26.54, 85.7238)),
random(value, float3(76.898, 12.54, 8.6788)));
}
// (0,0,0), (1,0,0) ... (1,1,1) 까지 각 점의 랜덤 결과물을 8중 보간
// for문을 통해 x → y → z 순서로 보간하여 최종값을 반환
// noise : 범위 확장. -1.0 + 2.0 * [0~1] → [-1, 1]이다.
float noise3d(float3 value)
{
value *= _Scale;
float3 interp = frac(value);
interp = smoothstep(0.0, 1.0, interp);
float3 ZValues[2];
for(int z = 0; z <= 1; z++)
{
float3 YValues[2];
for(int y = 0; y <= 1; y++)
{
float3 XValues[2];
for(int x = 0; x <= 1; x++)
{
float3 cell = floor(value) + float3(x,y,z);
XValues[x] = random3d(cell);
}
YValues[y] = lerp(XValues[0], XValues[1], interp.x);
}
ZValues[z] = lerp(YValues[0], YValues[1], interp.y);
}
float noise = -1.0 + 2.0 * lerp(ZValues[0], ZValues[1], interp.z);
return noise;
}
// 밀도(density)와 조명(diffuse)으로 구름 색상 계산 후 누적
fixed4 integrate(fixed4 sum, float diffuse, float density, fixed4 bgcol, float t)
{
// lighting = ambient + diffuse 조명.
// ambient: 푸르스름한 회색 기본광
// diffuse: 태양 방향 광량에 따라 강조되는 따뜻한 색
fixed3 lighting = fixed3(0.65, 0.68, 0.7) * 1.3 + 0.5 * fixed3(0.7, 0.5, 0.3) * diffuse;
// density가 낮으면 밝고 투명, density가 높으면 어두운 회색
fixed3 colrgb = lerp( fixed3(1.0, 0.95, 0.8), fixed3(0.65, 0.65, 0.65), density);
// density를 alpha로 사용하여 구름 불투명도 표현
fixed4 col = fixed4(colrgb.r, colrgb.g, colrgb.b, density);
col.rgb *= lighting;
// 깊이에 따라 지수적으로 감소하는 투과율에 의해 배경색과 blending
col.rgb = lerp(col.rgb, bgcol, 1.0 - exp(-0.003*t*t));
col.a *= 0.5;
col.rgb *= col.a;
return sum + col*(1.0 - sum.a);
}
// noiseMap(pos + 0.3 * _SunDir) : 태양 방향으로 약간 이동한 위치의 밀도
// diffuse : 태양빛을 받은 정도를 의미
#define MARCH(steps, noiseMap, cameraPos, viewDir, bgcol, sum, depth, t) { \
for (int i = 0; i < steps + 1; i++) \
{ \
if(t > depth) \
break; \
float3 pos = cameraPos + t * viewDir; \
if (pos.y < _MinHeight || pos.y > _MaxHeight || sum.a > 0.99) \
{\
t += max(0.1, 0.02*t); \
continue; \
}\
\
float density = noiseMap(pos); \
if (density > 0.01) \
{ \
float diffuse = clamp((density - noiseMap(pos + 0.3 * _SunDir)) / 0.6, 0.0, 1.0);\
sum = integrate(sum, diffuse, density, bgcol, t); \
} \
t += max(0.1, 0.02 * t); \
} \
}
#define NOISEPROC(N, P) 1.75 * N * saturate((_MaxHeight - P.y)/_FadeDist)
// 해당 위치에서의 구름 밀도 값
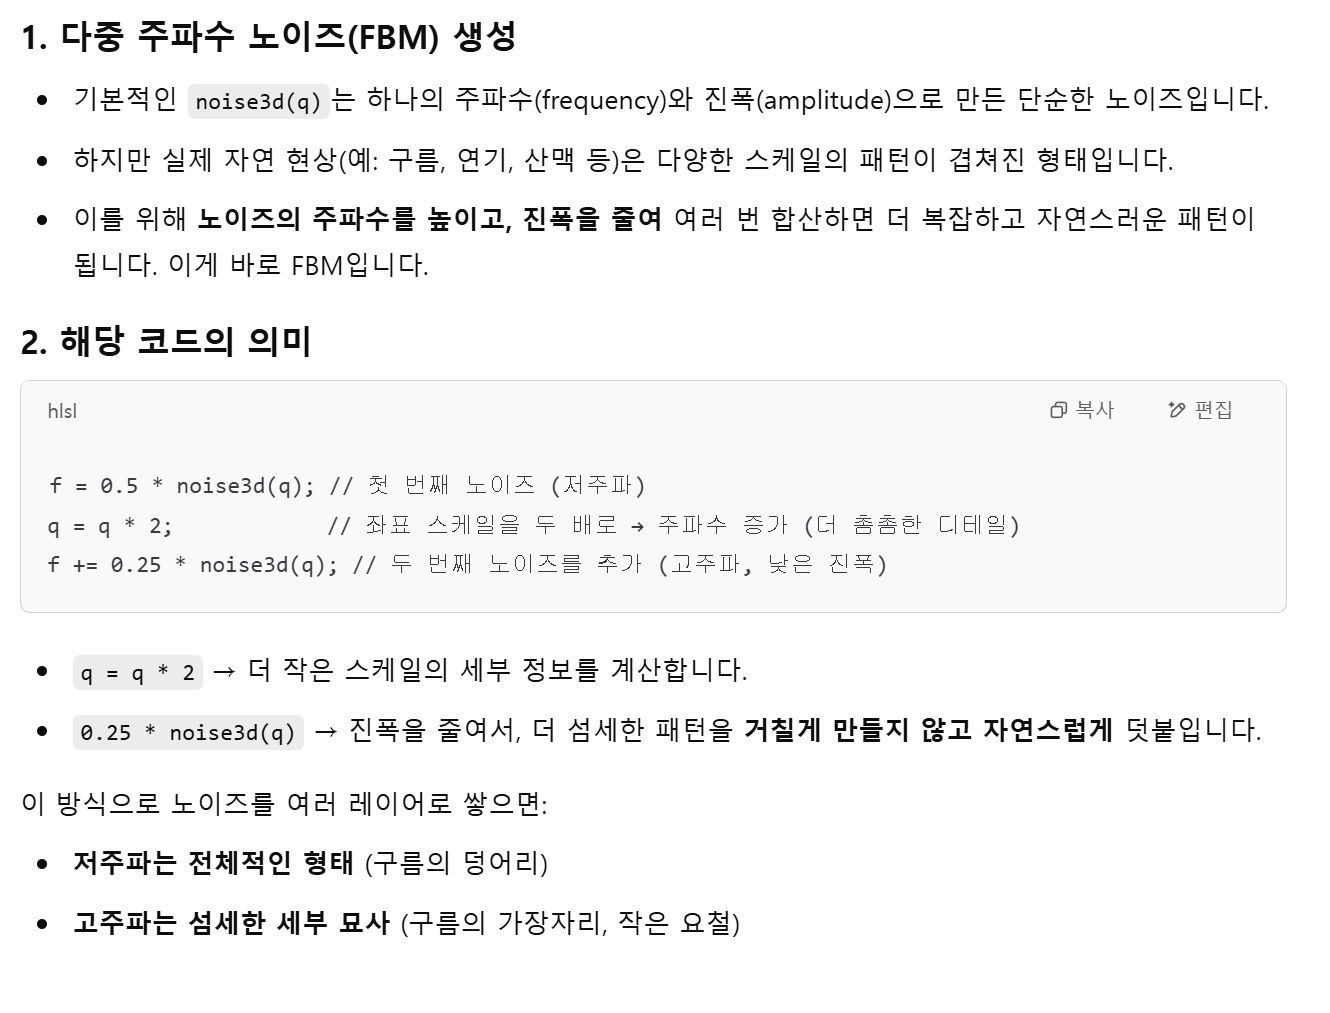
float map1(float3 q)
{
float3 p = q;
float f;
f = 0.5 * noise3d(q);
return NOISEPROC(f, p);
}
// 3. 매크로로 계산된 col을 clamp하여 반환 (매크로가 ct를 통해 누적하며 진행)
fixed4 raymarch(float3 cameraPos, float3 viewDir, fixed4 bgcol, float depth)
{
fixed4 col = fixed4(0,0,0,0);
float ct = 0;
MARCH(_Steps, map1, cameraPos, viewDir, bgcol, col, depth, ct);
return clamp(col, 0.0, 1.0);
}
// 1. 데이터 준비
v2f vert (appdata v)
{
v2f o;
o.wpos = mul(unity_ObjectToWorld, v.vertex).xyz;
o.pos = UnityObjectToClipPos(v.vertex);
o.view = o.wpos - _WorldSpaceCameraPos;
o.projPos = ComputeScreenPos(o.pos);
return o;
}
// 2. raymarch를 통해 구름 계산 시작
fixed4 frag (v2f i) : SV_Target
{
float depth = 1;
depth *= length(i.view);
fixed4 col = fixed4(1,1,1,0);
fixed4 clouds = raymarch( _WorldSpaceCameraPos, normalize(i.view) * _StepScale, col, depth);
fixed3 mixedCol = col * (1.0 - clouds.a) + clouds.rgb;
return fixed4(mixedCol, clouds.a);
}
ENDCG
}
}
}
```
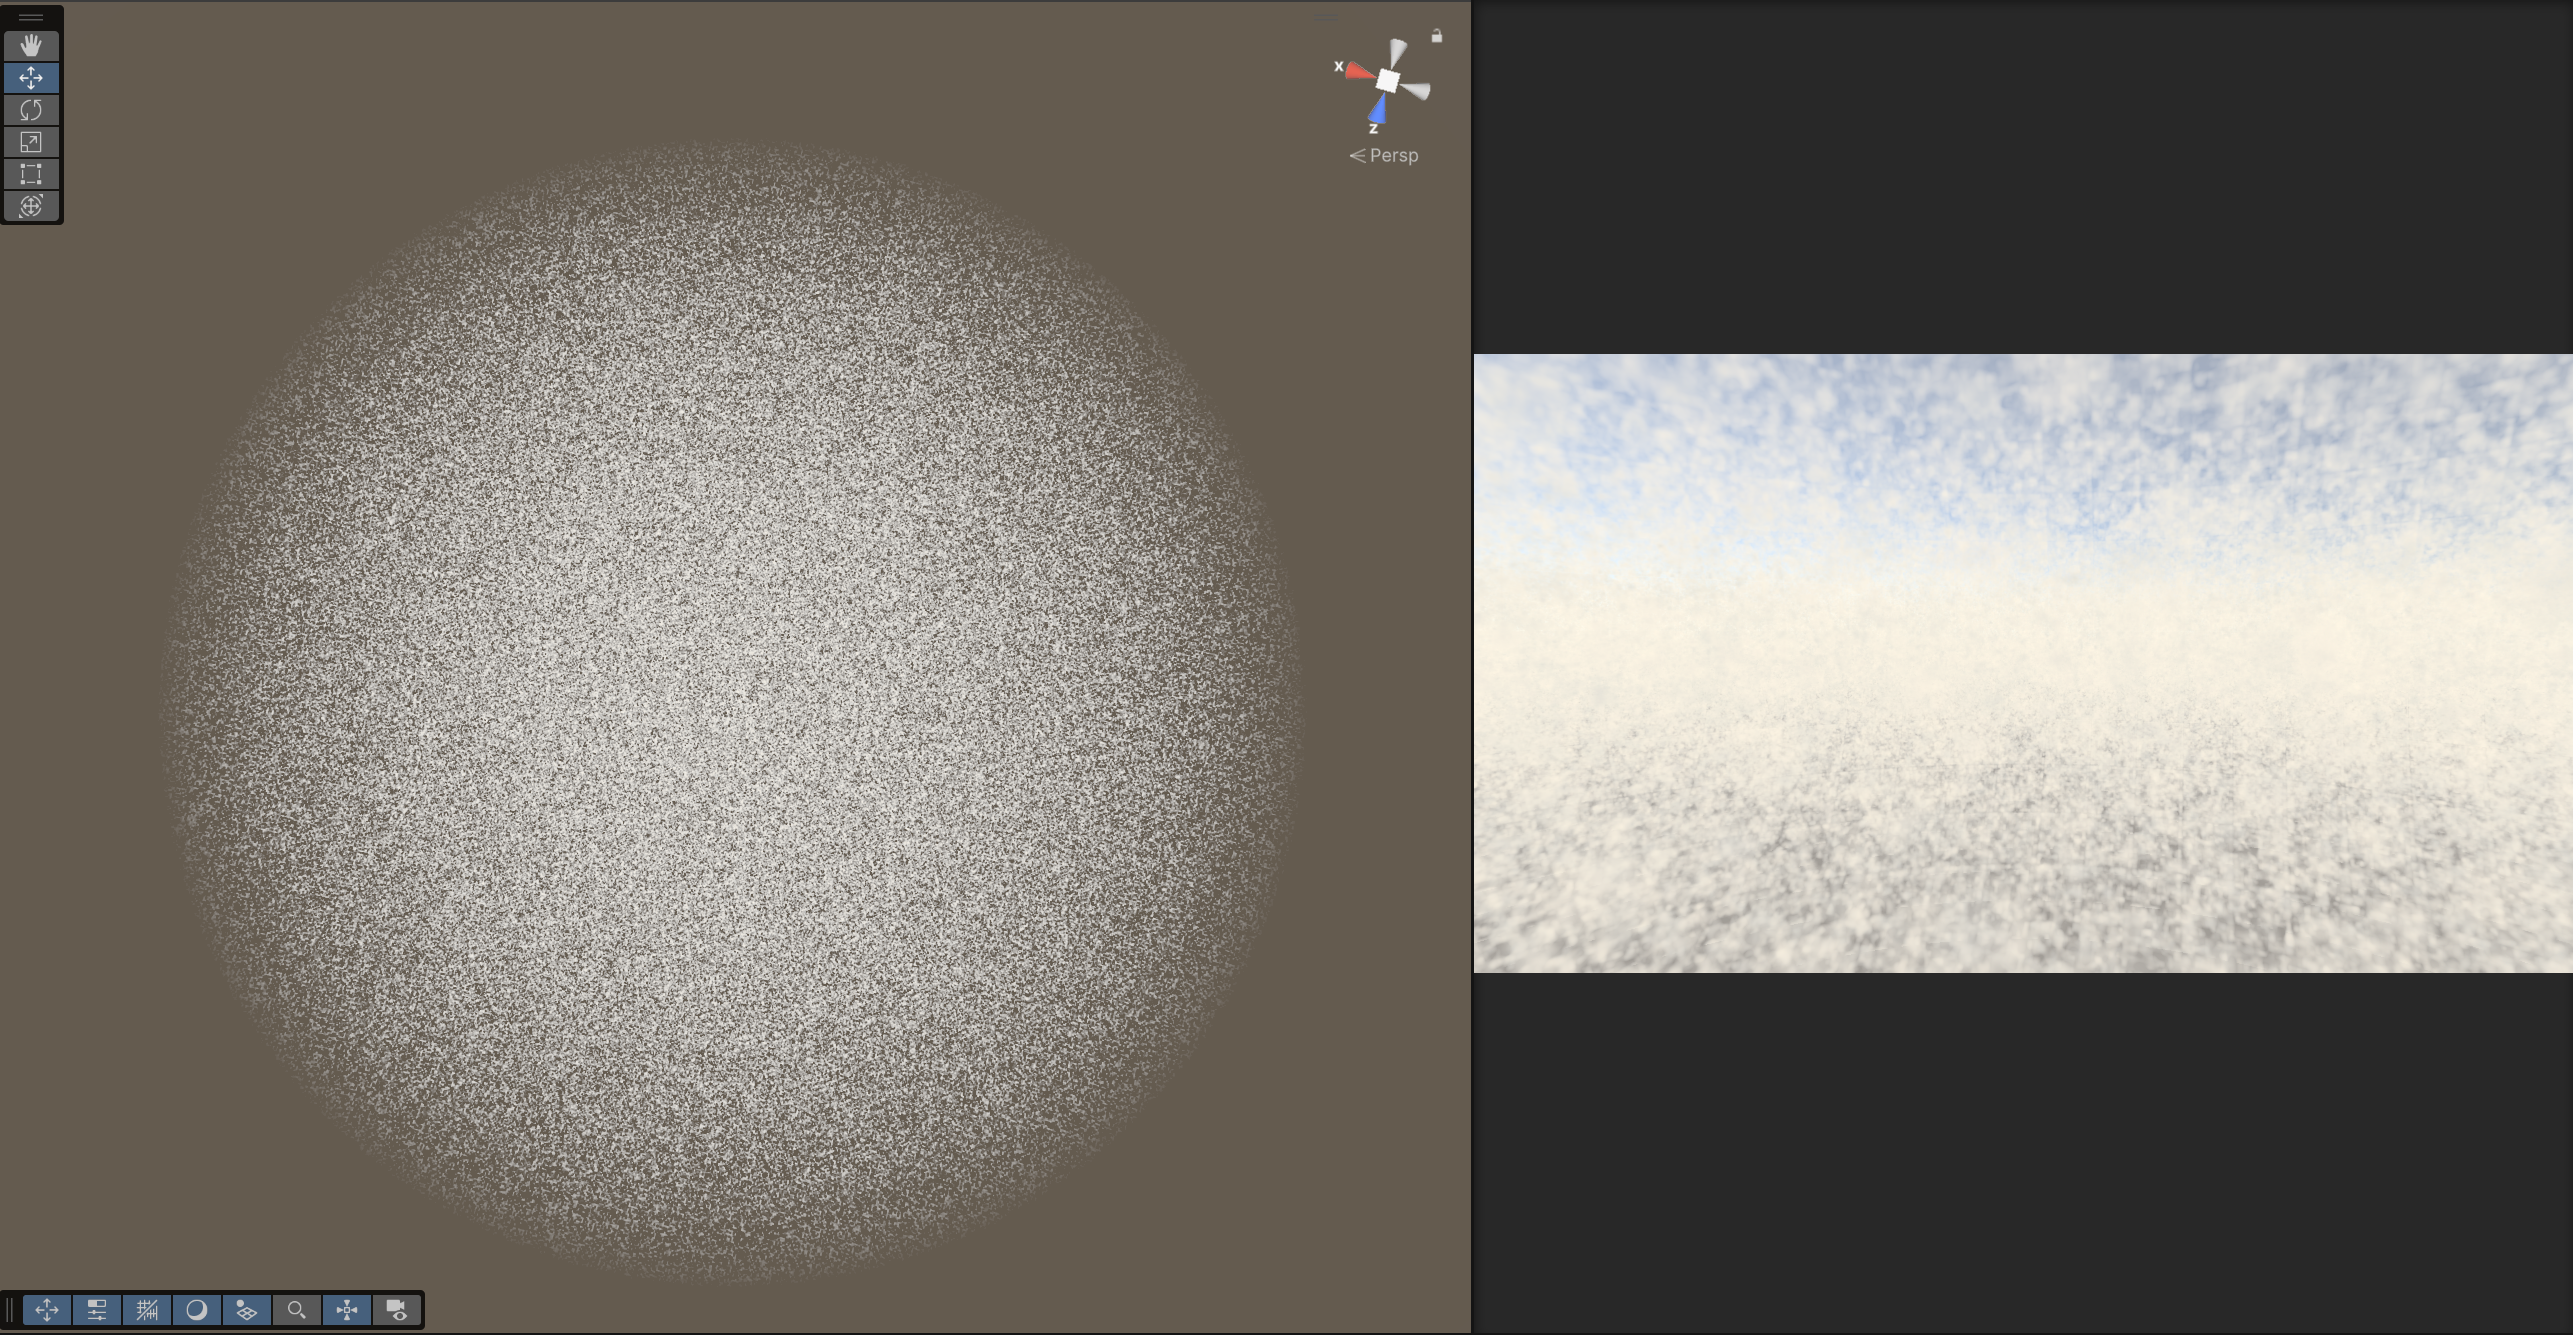
### Enhanced Noise
### Clouds On Camera
```cs
using UnityEngine;
[ExecuteInEditMode]
public class Clouds : MonoBehaviour
{
public Shader CloudShader;
float MinHeight = 0.0f;
public float MaxHeight = 5.0f;
public float FadeDist = 2;
public float Scale = 5;
public float Steps = 50;
public Texture ValueNoiseImage;
public Transform Sun;
Camera _Cam;
Material _Material;
public Material Material
{
get
{
if (_Material == null && CloudShader != null)
{
_Material = new Material(CloudShader);
}
if (_Material != null && CloudShader == null)
{
DestroyImmediate(_Material);
}
if (_Material != null && CloudShader != null && CloudShader != _Material.shader)
{
DestroyImmediate(_Material);
_Material = new Material(CloudShader);
}
return _Material;
}
}
void Start()
{
// 에디터에서 돌리다가 재컴파일되거나 스크립트가 붙은 상태로 Play 모드 전환될 때
// 기존 머티리얼이 중복으로 남아있는 걸 막기 위한 안전 장치
if (_Material)
DestroyImmediate(_Material);
}
Matrix4x4 GetFrustumCorners()
{
Matrix4x4 frustumCorners = Matrix4x4.identity;
Vector3[] fCorners = new Vector3[4];
_Cam.CalculateFrustumCorners(new Rect(0, 0, 1, 1), _Cam.farClipPlane, Camera.MonoOrStereoscopicEye.Mono, fCorners);
frustumCorners.SetRow(0, fCorners[1]);
frustumCorners.SetRow(1, fCorners[2]);
frustumCorners.SetRow(2, fCorners[3]);
frustumCorners.SetRow(3, fCorners[0]);
return frustumCorners;
}
[ImageEffectOpaque]
void OnRenderImage(RenderTexture source, RenderTexture destination)
{
if (_Material == null || ValueNoiseImage == null)
{
Graphics.Blit(source, destination);
return;
}
// 이런 초기화 코드들 Start()에 안 적는 이유 : 에디터 코드는 Start()를 계속 호출하는게 아니라서
if (_Cam == null)
_Cam = GetComponent();
Material.SetTexture("_ValueNoise", ValueNoiseImage);
if (Sun != null)
Material.SetVector("_SunDir", -Sun.forward);
else
Material.SetVector("_SunDir", Vector3.up);
Material.SetFloat("_MinHeight", MinHeight);
Material.SetFloat("_MaxHeight", MaxHeight);
Material.SetFloat("_FadeDist", FadeDist);
Material.SetFloat("_Scale", Scale);
Material.SetFloat("_Steps", Steps);
Material.SetMatrix("_FrustumCornersWS", GetFrustumCorners());
Material.SetMatrix("_CameraInvViewMatrix", _Cam.cameraToWorldMatrix);
Material.SetVector("_CameraPosWS", _Cam.transform.position);
CustomGraphicsBlit(source, destination, Material, 0);
return;
}
// 구름을 스크린에 그린다
static void CustomGraphicsBlit(RenderTexture source, RenderTexture dest, Material fxMaterial, int passNr)
{
RenderTexture.active = dest;
fxMaterial.SetTexture("_MainTex", source);
GL.PushMatrix();
GL.LoadOrtho();
fxMaterial.SetPass(passNr);
GL.Begin(GL.QUADS);
GL.MultiTexCoord2(0, 0.0f, 0.0f);
GL.Vertex3(0.0f, 0.0f, 3.0f); // BL
GL.MultiTexCoord2(0, 1.0f, 0.0f);
GL.Vertex3(1.0f, 0.0f, 2.0f); // BR
GL.MultiTexCoord2(0, 1.0f, 1.0f);
GL.Vertex3(1.0f, 1.0f, 1.0f); // TR
GL.MultiTexCoord2(0, 0.0f, 1.0f);
GL.Vertex3(0.0f, 1.0f, 0.0f); // TL
GL.End();
GL.PopMatrix();
}
protected virtual void OnDisable()
{
if (_Material)
DestroyImmediate(_Material);
}
}
```
(\_Cam은 Camera \_Cam)
* `_Cam.CalculateFrustumCorners()` : 카메라 frustum
* frustum : 시야에 보이는 영역을 표현한 입체
* `new Rect(0,0,1,1)` : 전체 뷰포트를 표현할 수 있음
* `_Cam.farClipPlane` : 카메라에서 가장 멀리 그려지는 거리에 위치한 평면
* `Camera.MonoOrStereoscopicEye.Mono` : 어느 눈의 시점인지 지정. Mono는 일반적인 단일 시점 카메라.
* `SetRow()` : 행렬의 행 할당
`OnRenderImage()`
* 카메라 포스트 프로세싱에 사용되는 함수
* Unity 카메라가 씬을 렌더링한 직후에 호출됨
* 렌더링된 결과(`source`)를 받아서 필터/이펙트 처리 후 `destination`에 출력하는 구조
* 이 함수가 호출되려면, 스크립트가 카메라에 붙어 있어야 하고,\
해당 카메라에 depthTextureMode 또는 PostProcess 관련 설정이 있어야 함.
`[ImageEffectOpaque]`
* 렌더 순서를 opaque 렌더링 이후(transparent 이전)로 설정
`Graphics.Blit()`
* Blit = Bit Block Transfer : 텍스처를 복사하거나 가공해서 다른 텍스쳐로 넘기는 함수
* `Graphics.Blit(source, destination);` : source 이미지를 destination으로 그냥 복사
* `Graphics.Blit(source, destination, _Material);` : \_Material에 연결된 셰이더를 사용해서 source를 처리한 뒤 destination에 씀
---
# Agent Instructions: Querying This Documentation
If you need additional information that is not directly available in this page, you can query the documentation dynamically by asking a question.
Perform an HTTP GET request on the current page URL with the `ask` query parameter:
```
GET https://lazyartisan.gitbook.io/note/main-page/courses/unity-shader.md?ask=
```
The question should be specific, self-contained, and written in natural language.
The response will contain a direct answer to the question and relevant excerpts and sources from the documentation.
Use this mechanism when the answer is not explicitly present in the current page, you need clarification or additional context, or you want to retrieve related documentation sections.